图像上传功能实现
一、后端
文件存放在images.path路径下
package com.like.common;

import jakarta.servlet.ServletOutputStream;
import jakarta.servlet.http.HttpServletResponse;
import org.springframework.beans.factory.annotation.Value;
import org.springframework.web.bind.annotation.*;
import org.springframework.web.multipart.MultipartFile;

import java.io.File;
import java.io.FileInputStream;
import java.io.FileNotFoundException;
import java.io.IOException;
import java.util.UUID;

/**
 * 本地文件上传下载
 */
@RestController
@RequestMapping("/common")
@CrossOrigin
public class CommonController {
     @Value("${images.path}")
     private String basePath;

     /**
      * 文件上传
      * @param file
      * @return
      */
     @PostMapping("/upload")
     public CommonDto<String> upload(MultipartFile file){
          //原始文件名
          String originalFilename = file.getOriginalFilename();
          String suffix = originalFilename.substring(originalFilename.lastIndexOf("."));
          //使用UUID重新生成一个文件名,防止文件名重复,造成文件覆盖
          String fileName = UUID.randomUUID().toString() + suffix;
          //创建一个目录
          File dir = new File(basePath);
          //判断当前目录是否存在
          if(!dir.exists()){
               //如果目录不存在就直接创建
               dir.mkdirs();
          }
          try {
               //将临时文件转存到指定位置
               file.transferTo(new File(basePath + fileName));
          } catch (IOException e) {
               e.printStackTrace();
          }
          CommonDto<String> commonDto = new CommonDto<>();
          commonDto.setContent(fileName);
          return commonDto;
     }


     /**
      * 文件下载接口
      */
     @GetMapping("/download")
     public void download(String name, HttpServletResponse response){
          try {
               //输入流,通过输入流读取文件内容
               FileInputStream fileInputStream = new FileInputStream(new File(basePath + name));
               //输出流 通过输出流将文件返回给浏览器,在浏览器中展示图片
               ServletOutputStream outputStream = response.getOutputStream();
               response.setContentType("/image/jpeg");
               int len = 0;
               byte[] bytes = new byte[1024];
               while((len = fileInputStream.read(bytes))!=-1){
                    outputStream.write(bytes,0,len);
                    outputStream.flush();
               }
               //关闭资源
               outputStream.close();
               fileInputStream.close();
          } catch (Exception e) {
               e.printStackTrace();
          }
     }
}
二、前端
表格元素里面添加如下代码
   <el-table-column label="头像">
          <template slot-scope="scope">
            <el-popover
                placement="top-start"
                trigger="hover">
              <img :src="scope.row.avatar" style="width: 150px; height: 150px;">
              <img :src="scope.row.avatar" slot="reference" style="width: 50px; height: 50px;">
            </el-popover>
          </template>
        </el-table-column>
新增和修改表单里添加如下代码
<!--        头像-->
        <el-form-item label="头像" :label-width="formLabelWidth" prop="avatar">
          <el-upload
              class="avatar-uploader"
              action="http://localhost:3333/common/upload?module=avatar"
              :show-file-list="false"
              :on-success="handleAvatarSuccess">
            <img v-if="form.avatar" :src="form.avatar" class="avatar">
            <i v-else class="el-icon-plus avatar-uploader-icon"></i>
          </el-upload>
        </el-form-item>
methods里写handleAvatarSuccess逻辑
 handleAvatarSuccess(res, file) {
      this.form.avatar = `http://localhost:3333/common/download?name=${res.content}`
      //手动触发一头像字段的校验
      this.$refs.foreName.validateField('avatar');

      //强制刷新
      this.$forceUpdate();
    },
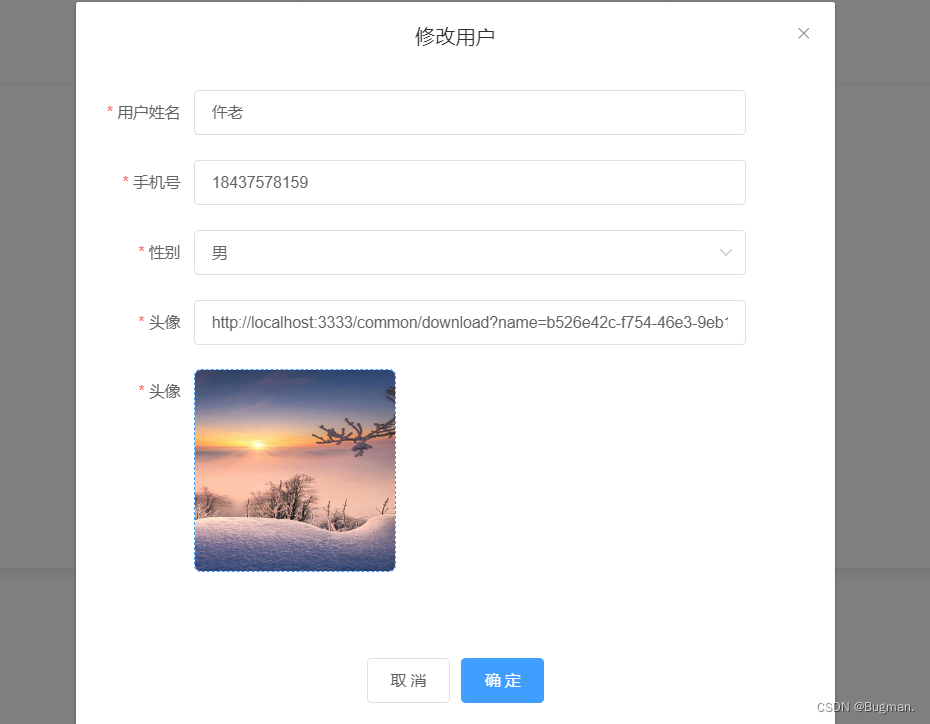
三、效果如下


至此整个项目的开发工作全部完结