阿里云OSS文件上传
需求分析:实现文件上传与下载 ,与SprinCloud Alibaba整合
步骤一:注册帐号

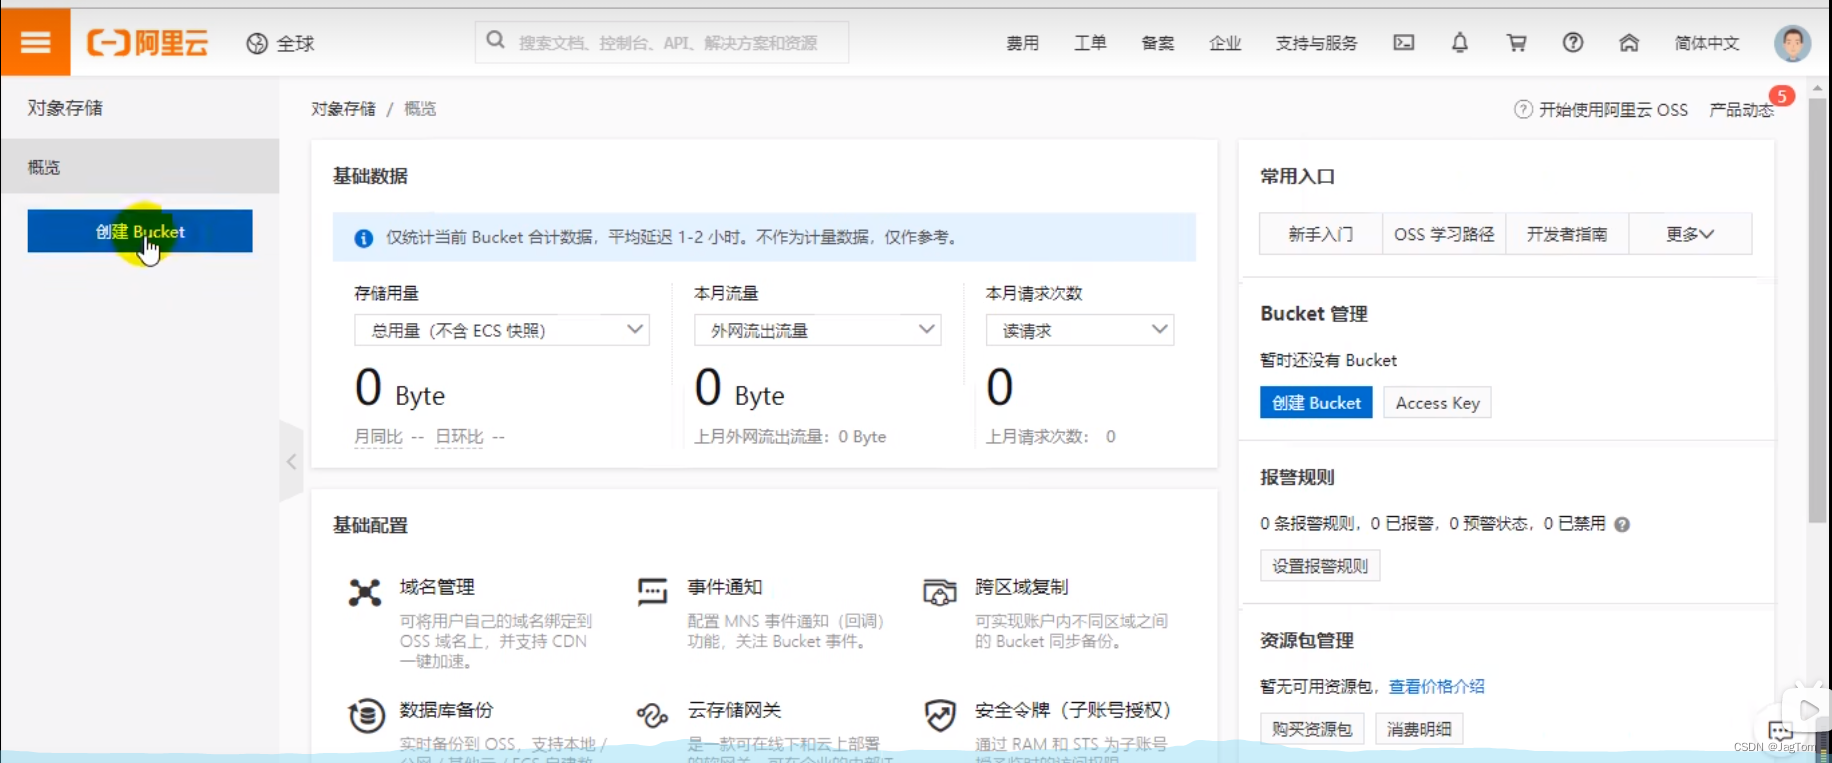
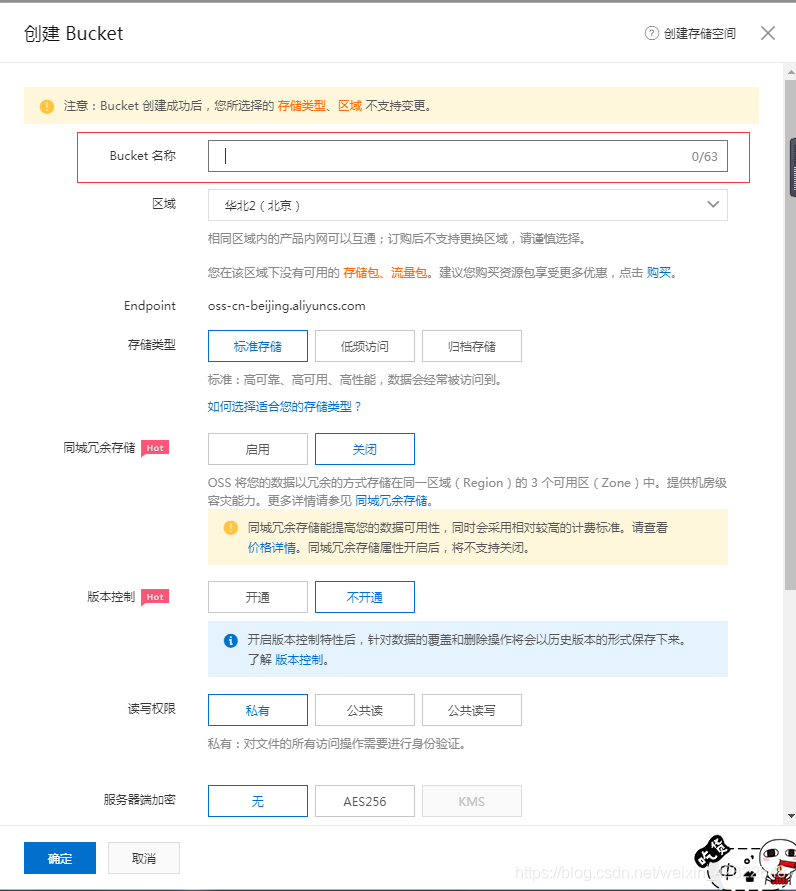
第二步:创建Bucket

第三步,创建Accesskey
注意:创建时候一定记得复制帐号密码,密码只在创建成功后显示一次!

第四步:安装对象存储OSS并使用
官方是原生的使用方法,导入原生包
<dependency>
    <groupId>com.aliyun.oss</groupId>
    <artifactId>aliyun-sdk-oss</artifactId>
    <version>3.15.0</version>
</dependency>
@Test
public void SossTest() throws FileNotFoundException {
// yourEndpoint填写Bucket所在地域对应的Endpoint。以华东1(杭州)为例,Endpoint填写为https://oss-cn-hangzhou.aliyuncs.com。
String endpoint = "oss-cn-hangzhou.aliyuncs.com";
// 阿里云账号AccessKey拥有所有API的访问权限,风险很高。强烈建议您创建并使用RAM用户进行API访问或日常运维,请登录RAM控制台创建RAM用户。
String accessKeyId = "LTAI5t7Mo77o7AMrp******";
String accessKeySecret = "qpXXnqaRegprSzYn******";
// 填写Bucket名称,例如examplebucket。
String bucketName = "gilgamesh-mail";
// 创建OSSClient实例。
OSS ossClient = new OSSClientBuilder().build(endpoint, accessKeyId, accessKeySecret);
InputStream inputStream=new FileInputStream("文件路径.jpg");
// 创建存储空间。
ossClient.putObject(bucketName,"上传的文件取个名字",inputStream);
// 关闭OSSClient。
ossClient.shutdown();
System.out.println("ok");
}使用方法二:SpringCloud alibaba-oss
导入依赖
    <!-- 文件上传与下载 -->
        <dependency>
            <groupId>com.alibaba.cloud</groupId>
            <artifactId>spring-cloud-alicloud-oss</artifactId>
            <version>2.2.0.RELEASE</version>
        </dependency>
配置application.yaml
# mysql
spring:
  cloud:
    nacos:
      discovery:
        server-addr: 127.0.0.1:8848
    alicloud:
      access-key: LTAI5t7Mo77o******     #阿里oss文件上传与下载
      secret-key: qpXXnqaRegprSzYn45QJ9XsWRtW4tk*****
        endpoint: oss-cn-hangzhou.aliyuncs.com
  application:
    name: ThirdPartModle
编写Controller
@RestController
public class OssController {

    @Resource
    OSSClient ossClient;

    @Value("${spring.cloud.alicloud.oss.endpoint}")
    private  String endpoint;

    @Value("${spring.cloud.alicloud.access-key}")
    private  String accessId;


    @RequestMapping("/oss/policy")
    public R policy(){
        // 阿里云账号AccessKey拥有所有API的访问权限,风险很高。强烈建议您创建并使用RAM用户进行API访问或日常运维,请登录RAM控制台创建RAM用户。
//        String accessId = "yourAccessKeyId";
//        String accessKey = "yourAccessKeySecret";
        // Endpoint以华东1(杭州)为例,其它Region请按实际情况填写。
//        String endpoint = "oss-cn-hangzhou.aliyuncs.com";
        // 填写Bucket名称,例如examplebucket。
        String bucket = "gilgamesh-mail";
        // 填写Host地址,格式为https://bucketname.endpoint。
        String host = "https://"+bucket+"."+endpoint;
        // 设置上传回调URL,即回调服务器地址,用于处理应用服务器与OSS之间的通信。OSS会在文件上传完成后,把文件上传信息通过此回调URL发送给应用服务器。
//  String callbackUrl = "https://192.168.0.0:8888";
        // 设置上传到OSS文件的前缀,可置空此项。置空后,文件将上传至Bucket的根目录下。
        String format = new SimpleDateFormat("yyyy-MM-dd").format(new Date());
        String dir = format+"/";
        Map<String, String> respMap=null;
//        OSSClient client = new OSSClient(endpoint, accessId, accessKey);
        try {
            long expireTime = 30;
            long expireEndTime = System.currentTimeMillis() + expireTime * 1000;
            Date expiration = new Date(expireEndTime);
            PolicyConditions policyConds = new PolicyConditions();
            policyConds.addConditionItem(PolicyConditions.COND_CONTENT_LENGTH_RANGE, 0, 1048576000);
            policyConds.addConditionItem(MatchMode.StartWith, PolicyConditions.COND_KEY, dir);

            String postPolicy = ossClient.generatePostPolicy(expiration, policyConds);
            byte[] binaryData = postPolicy.getBytes("utf-8");
            String encodedPolicy = BinaryUtil.toBase64String(binaryData);
            String postSignature =ossClient.calculatePostSignature(postPolicy);

            respMap = new LinkedHashMap<String, String>();
            respMap.put("accessid", accessId);
            respMap.put("policy", encodedPolicy);
            respMap.put("signature", postSignature);
            respMap.put("dir", dir);
            respMap.put("host", host);
            respMap.put("expire", String.valueOf(expireEndTime / 1000));

            // respMap.put("expire", formatISO8601Date(expiration));
//跨域用网关解决:这里就不需要了
//            JSONObject jasonCallback = new JSONObject();
//            jasonCallback.put("callbackUrl", callbackUrl);
//            jasonCallback.put("callbackBody",
//                    "filename=${object}&size=${size}&mimeType=${mimeType}&height=${imageInfo.height}&width=${imageInfo.width}");
//            jasonCallback.put("callbackBodyType", "application/x-www-form-urlencoded");
//            String base64CallbackBody = BinaryUtil.toBase64String(jasonCallback.toString().getBytes());
//            respMap.put("callback", base64CallbackBody);


//            JSONObject ja1 = JSONObject.fromObject(respMap);
//            System.out.println(ja1.toString());
//            response.setHeader("Access-Control-Allow-Origin", "*");
//            response.setHeader("Access-Control-Allow-Methods", "GET, POST");
//            response(request, response, ja1.toString());

        } catch (Exception e) {
            // Assert.fail(e.getMessage());
            System.out.println(e.getMessage());
        }
        return  R.ok().put("data",respMap);
    }

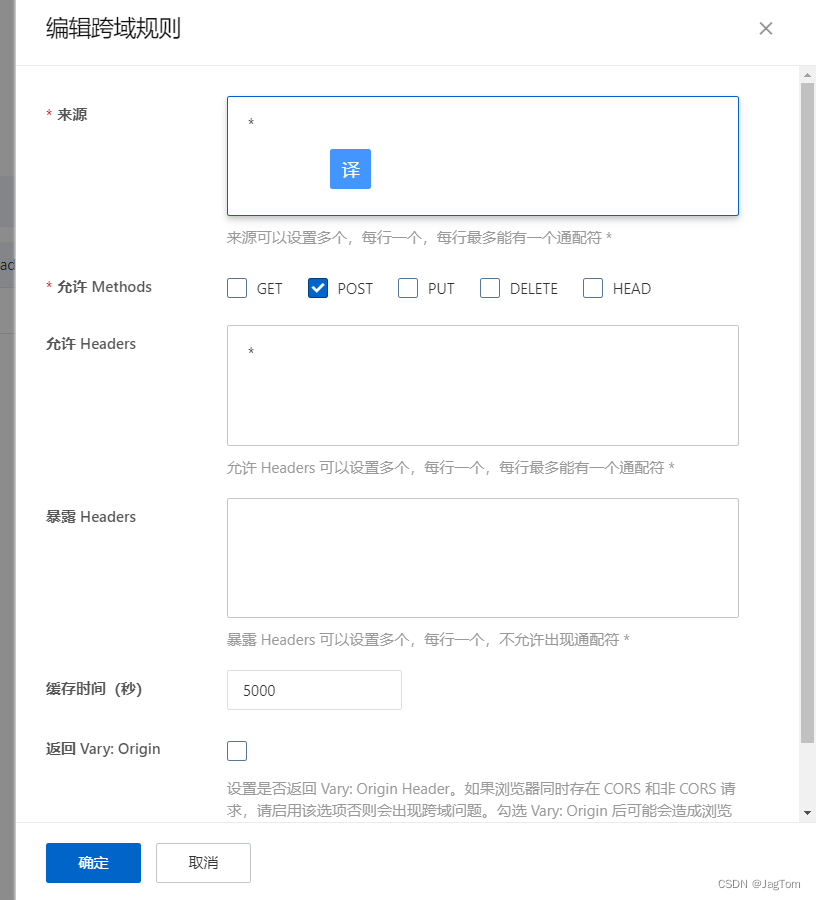
}cors跨域问题:
