Unity内接入WebRTC视频流
一、说明
目前Unity内基于谷歌的WebRTC通讯存在一定技术壁垒,所以选择与前端HTML结合解决需求。由前端提供JS与HTML,HTML内由前端编写了可以适配并且可以正常播放WebRTC视频流;然后在Unity内导入插件“WebViewForWindow”,该插件可以在Unity内通过API加载HTML网页到UI面板或者三维场景,并且可以对网页内容进行点击等操作。从而解决了WebRTC视频流的功能难点。
二、流程
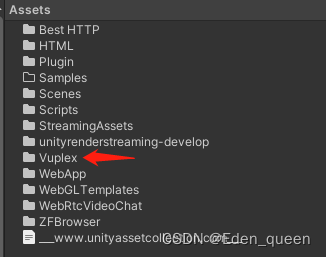
1.在Unity工程内导入“WebViewForWindow”插件,得到如图文件夹。
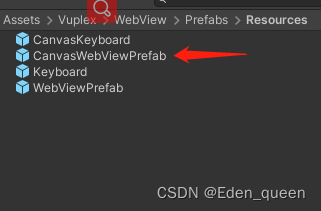
2.将该路径下的预制体拖到场景内的Canvas下
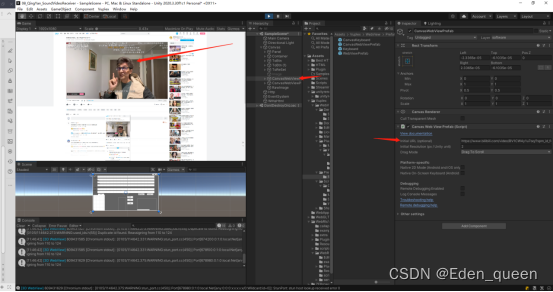
3.如果填入Url,直接Unity运行可直接加载网页(但是不适配我们本次功能需求,只做介绍)
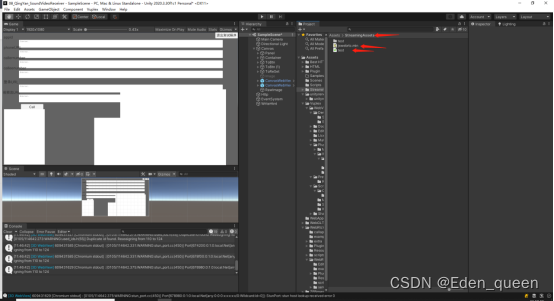
4.我们需要通过http接口请求返回WebRTC流(如果是其他方式拿到WebRTC视频流流程一样),并且将该流写入HTML文件内对应的url位置。所以我们要先去布置HTML和JS文件在工程内的位置和应用。我们此次把JS文件以及HTML文件放在了StreamingAssets文件夹下。方便读取以及后续适配打包发布exe版本不需要考虑JS、HTML文件位置和路径。
5.在Unity内编写可以读写HTML的功能。根据需求读写HTML内的WebRTC流的位置即可。
using System.Collections;
using System.Collections.Generic;
using UnityEngine;
using System;
using System.IO;
public class WriteHtml : MonoBehaviour
{
    private List<string> htmlContent = new List<string>();//用于读写html的容器
    private string path = Application.streamingAssetsPath + "/test.html";//前端网页位置
    private int webrtcIndex = 23;//网页内webrtc所在行的下标

    private string newWebRtc;//传入的新的webrtc地址

    public static WriteHtml _instance;
    private void Awake()
    {
        _instance = this;
    }

    // Start is called before the first frame update
    void Start()
    {
        //测试
        ReadHtmlTxt("填入webrtc视频流地址")
    }
    /// <summary>
    /// 读取html
    /// </summary>
    /// <param name="_newWebRtc">webrtc视频流地址</param>
    public void ReadHtmlTxt(string _newWebRtc)
    {
        newWebRtc = "var url = '" + _newWebRtc+ "';";
        htmlContent = new List<string>();
        try
        {
            // 创建一个 StreamReader 的实例来读取文件
            // using 语句也能关闭 StreamReader
            using (StreamReader sr = new StreamReader(path))
            {
                string line;

                // 从文件读取并显示行,直到文件的末尾
                while ((line = sr.ReadLine()) != null)
                {
                    //Console.WriteLine(line);
                    Debug.Log(line);
                    htmlContent.Add(line);
                }
            }
        }
        catch (Exception e)
        {
            // 向用户显示出错消息
            //Console.WriteLine("The file could not be read:");
            //Console.WriteLine(e.Message);
            Debug.Log(e.Message);
            Debug.Log("The file could not be read:");
        }
        WriteHtmlTxt();
    }
    /// <summary>
    /// 写入html
    /// </summary>
    public void WriteHtmlTxt()
    {
        using (StreamWriter sw = new StreamWriter(path))
        {

            for (int i = 0; i < htmlContent.Count; i++)
            {
                if (i == webrtcIndex)
                {
                    sw.WriteLine(newWebRtc);
                    continue;
                }
                sw.WriteLine(htmlContent[i]);
            }
        }
    }
}
html相关内容
<!DOCTYPE html>
<html>
<head>
    <meta charset="UTF-8">
    <meta name="viewport" content="width=device-width, initial-scale=1.0">
    <title>webrtc 视频播放</title>
</head>
<style>
.videoStyle{
width:100%;
height:100%;
position:fixed;
left:0;
top:0;
bottom:0;
right:0
}
</style>
<body>
    <video id="video_webrtc" controls class='videoStyle'></video>
	<script type="text/javascript" src="./jswebrtc.min.js"></script>
	<script type="text/javascript">
		var video = document.getElementById('video_webrtc');
		var url = '填入webrtc视频流地址';
		var option={
			video: video,
			autoplay: true
		}
		var player = new JSWebrtc.Player(url,option);
	</script>
</body>
</html>
6.然后要通过代码,让插件读取StreamingAssets下的HTML文件即可。
具体代码调用如下:
声明变量public CanvasWebViewPrefab canvasWebViewPrefab;调用canvasWebViewPrefab.WebView.LoadUrl(“file://” +Application.streamingAssetsPath + “/test.html”);就可以显示出来前端的网页了。具体该预制体的窗口大小可以根据需求调整,插件会进行适配。
要注意的点就是 该预设上的脚本“CanvasWebViewPrefabs.cs”脚本内的Start方法会将进行初始化工作,所以LoadUrl方法要在初始化之后调用。可以通过if (canvasWebViewPrefab.WebView.IsInitialized) ;该API去判定初始化是否完成。WebView该接口字段为核心内容,其中的API都可以应对需求,如果今后需求有变,可参考该接口的字段和方法。
public CanvasWebViewPrefab canvasWebViewPrefa
canvasWebViewPrefa.WebView.LoadUrl("file://" + Application.streamingAssetsPath + "/test.html");
另外还要说的就是,LoadUrl方法可以读取本地的HTML文件也可以读取Http的连接。
如果对插件不熟悉,可以上网查看对应的API和示例场景的内容。
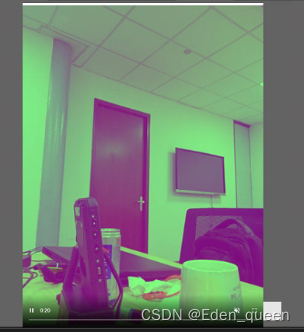
三、windows电脑关于绿幕问题的设置
WebViewForWindow插件的浏览器内核是谷歌chrome浏览器。
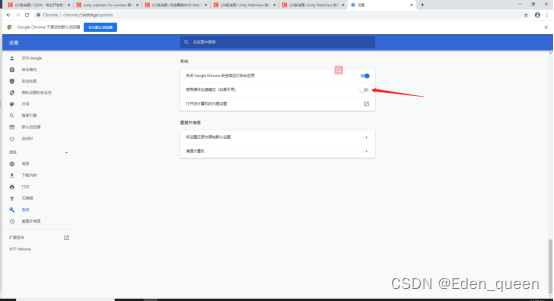
1.如果开启硬件加速会出现这样的绿幕情况,需要关闭浏览器内设置的硬件加速选项。
2.需要在winodw设置内图形设置下设置GoogleChrome为高性能模式:
参考下方视频添加谷歌浏览器到图形性能首选项的列表,并且设置为高性能模式。
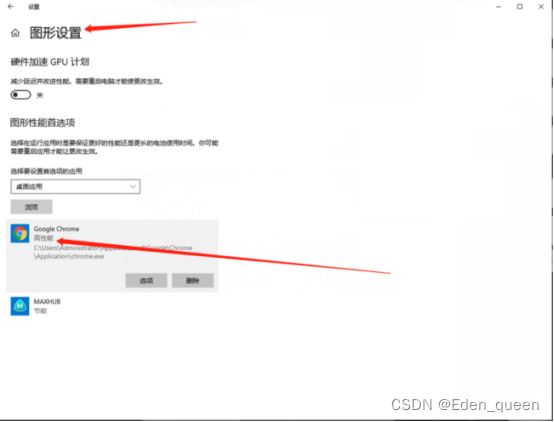
设置成功之后颜色会正常