核酸检测识别系统——项目部署
目录
项目部署
域名
这里特别说一下,我们的域名和服务器均来自腾讯云。腾讯云的某些秒杀活动需要谨慎参加,因为后期的续费可能变得难以负担,同志们谨慎消费!
服务器
服务器购买了腾讯云的2核4G服务器,峰值带宽:30Mbps。
服务器简单配置了Linux宝塔面板:
wget -O install.sh http://download.bt.cn/install/install-ubuntu_6.0.sh && sudo bash install.sh安装好后一定要记住当下的用户名和密码,以及端口。我们要在服务器防火墙的安全组中添加规则。
根据宝塔面板提供的帮助,我们可以装好:PHP,phpmyadmin,Nginx,mysql,FTPServer
因为这是一个以Python为基础的项目,因此Python安装很重要(Python3.6版本)
命令如下:
wget https://www.python.org/ftp/python/3.6.3/Python-3.6.3.tgz
tar -xf Python-3.6.3.tgz
cd Python-3.6.3
./configure --prefix=/usr/local/python3
make
make install
ln -s /usr/local/python3/bin/python3 /usr/bin/python3
ln -s /usr/local/python3/bin/pip3 /usr/bin/pip3
vim ~/.bash_profile
写入如下内容:
# Get the aliases and functions
if [ -f ~/.bashrc ]; then
. ~/.bashrc
fi
# User specific environment and startup programs
PATH=$PATH:$HOME/bin:/usr/local/python3/bin
export PATH
source ~/.bash_profile
sudo echo alias python=python3 >> ~/.bashrc
source ~/.bashrc
python3 -V
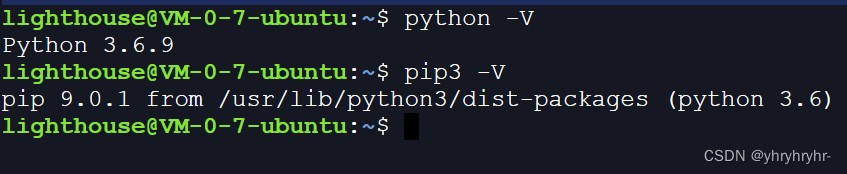
pip3 -V这里已经设置了Python的默认版本并且安装了pip3,但是为了避免不必要的麻烦,可以直接用python3 xxx.py 进行操作,这样最稳妥,不会出现任何异常。
项目依赖
装好Python3.6后安装对应的第三方依赖包,,我们也用pip3进行第三方包安装:
pip3 install -r requirements.txt -i http://pypi.douban.com/simple/ --trusted-host pypi.douban.com之后安装nodejs(14版本)和npm
sudo apt update
sudo apt install nodejs npm
curl -sL https://deb.nodesource.com/setup_14.x | sudo -E bash - 14版本是最新最稳定的!
sudo apt install nodejs
node --version
npm --version
sudo apt install build-essentialPython定时任务
run.py
# encoding: utf-8
import os
import schedule
dirname = r"/www/wwwroot/hesuan/testimg2"
def run():
if(len(os.listdir(dirname))!=0): # 检查项目源文件是否为空,非空则开始运行
os.system("python3 view.py")
schedule.every(1).minutes.do(run) # 为了减少运行压力,每分钟执行一次
while True:
schedule.run_pending()zip.py
# encoding: utf-8
import schedule
import os
import zipfile
import shutil
import pymysql
dirname = r"/www/wwwroot/hesuan/testimg1" # 压缩文件目录
def zip():
file = dirname
zipfile_name = os.path.basename(file) + '.zip' # 将目标文件压缩为zip文件
with zipfile.ZipFile(zipfile_name, 'w') as zfile:
for foldername, subfolders, files in os.walk(file):
zfile.write(foldername)
for i in files:
zfile.write(os.path.join(foldername, i))
zfile.close()
schedule.every().monday.at("00:00").do(zip) # 每周一 00:00执行一次压缩
while True:
schedule.run_pending()clear.py
# encoding: utf-8
import schedule
import os
import zipfile
import shutil
import pymysql
filepath = r"/www/wwwroot/hesuan/testimg1" # 定期清空的目标文件
host = "127.0.0.1"
username = "hesuan_result"
passwd = "???"
dbname = "hesuan_result"
port = 3306
charset = "utf8"
table_name = "xinan"
def clear():
db = pymysql.connect(host=host, user=username, passwd=passwd, port=port, db=dbname)
cursor = db.cursor()
sql_delete = "Update %s set time_result = '' , test_result = '' " % table_name
cursor.execute(sql_delete) # 清空数据表
db.commit()
shutil.rmtree(filepath) # 删除目标文件
os.mkdir(filepath) # 再新建一个一样的文件
print("Okkkkkkkkkkkkkkk")
# clear()
schedule.every().tuesday.at("00:00").do(clear)
while True:
schedule.run_pending()pm2项目挂载
sudo npm install -g pm2pm2常用命令
pm2 list
pm2 start (all)
pm2 delete (all)
pm2 stop (all)
pm2 restart
pm2 start run.py -x --interpreter python3 # 挂载Python项目每次启动成功后,要 pm2 save , pm2 list 保存并查看是不是挂载成功。

但是考虑到,我们的服务器只有2核4G,并不能同时挂载很多像上面的run.py,所以我们需要进行一个串行安排,但如果班级太多又可能有班级一直得不到响应。所以我做了一个用随机数控制的,串行并行结合的进程控制方式。
首先,如果你的服务器有4个核,希望你用python最正经的进程安排
    t1 = threading.Thread(target=进程1)
    t2 = threading.Thread(target=进程2)
    t1.start()
    t2.start()
但可惜,我的服务器虽然有两个核,但安排两个进程的话,单核CPU无法解决问题
# encoding: utf-8
def run1():
print("working")
if(len(os.listdir(dir20xinan))!=0):
print("20信安")
os.system("python3 /www/wwwroot/hesuan/view.py")
if(len(os.listdir(dir20ruangong))!=0):
print("20软工")
os.system("python3 /www/wwwroot/hesuan20ruangong/view.py")
print(time.strftime("%Y-%m-%d-%H_%M_%S", time.localtime()))
def run2():
print("working")
if(len(os.listdir(dir19yingcai))!=0):
print("19英才")
os.system("python3 /www/wwwroot/hesuan19yingcai/view.py")
if(len(os.listdir(dir19jike))!=0):
print("19计科")
os.system("python3 /www/wwwroot/hesuan19jike/view.py")
print(time.strftime("%Y-%m-%d-%H_%M_%S", time.localtime()))
def run():
print("start")
print(time.strftime("%Y-%m-%d-%H_%M_%S", time.localtime()))
if(len(os.listdir(dir20xinan))==0 and len(os.listdir(dir20ruangong))==0 and len(os.listdir(dir19yingcai))==0 and len(os.listdir(dir19jike)) == 0):
print("resting")
print(time.strftime("%Y-%m-%d-%H_%M_%S", time.localtime()))
time.sleep(10)
else:
rand = random.randint(0, 1)
if rand == 0:
run1()
if rand == 1:
run2()
print("finished ALL")
print(time.strftime("%Y-%m-%d-%H_%M_%S", time.localtime()))
schedule.every(1).minute.do(run)
while True:
schedule.run_pending()本项目对CPU要求较高,我们重点关注负载,而不是CPU使用(因为代码工作量确实大)

Nginx反向代理
可以用下面这段代码,添加到Nginx.conf配置文件的server{}中,解决端口和域名的对应问题,但首先我们要把域名解析到服务器,@和www都要解析,这样我们输入不输入www就都可以访问到我们的网站了
server {
        listen 80;
        server_name www.hengmengkeji.cn;
        proxy_ignore_client_abort on;

        location / {
            proxy_pass http://127.0.0.1:3000/;
            proxy_read_timeout 3200;
            proxy_redirect off;
            proxy_set_header Host $host;
            proxy_set_header X-Real-IP $remote_addr;
            proxy_set_header X-Forwarded-For $proxy_add_x_forwarded_for;
        }
}-
listen 80 是因为我们每次访问域名都是默认的80端口
-
server_name 是我们解析到服务器的域名
-
proxy_pass 后填写我们要代理的IP:端口
如果是绑定根目录,其实宝塔的服务配置就很?,我们同样是把域名解析到对应同公司下的服务器,在添加项目绑定站点:

同样是有没有www的两个域名都要绑定,这样可以保证访问的稳定。
绑定后,我们在根目录就可以看到网站的内容了,如果你现在访问域名得到绑定成功的界面,那就可以往里添加自己的项目了!