Vue Element upload组件和Iview upload 组件上传文件
今天要分享的是使用这俩个UI组件库的upload组件分别实现调用组件本身的上传方法实现和后台交互。接下来就是开车的时间,请坐稳扶好~
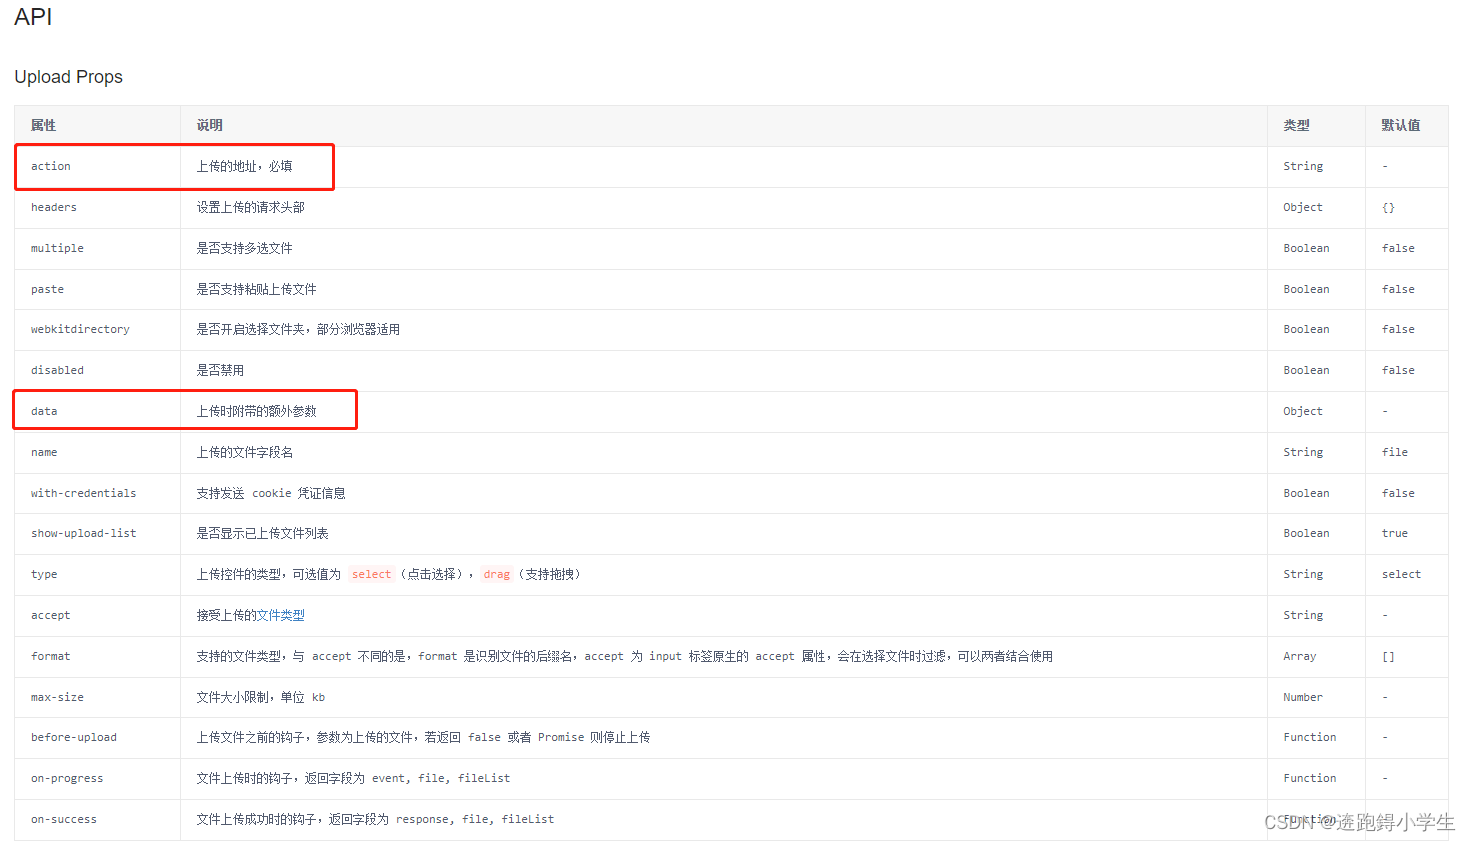
一、element upload组件传送门
1、html文件
<el-upload ref="uploadRef" :action="uploadUrl" :data="dataObj" :multiple="true" :before-upload="beforeUpload"
	:on-success="handleSuccess" :auto-upload="false">
	<template #trigger>
		<el-button type="primary">文件选择
			<Icon type="md-arrow-round-up" />
		</el-button>
	</template>
	<el-button @click="submitUpload">确认上传
		<Icon type="md-arrow-round-up" />
	</el-button>
</el-upload>
注意事项: 使用组件本身的上传事件,必须加auto-upload属性设置为false;
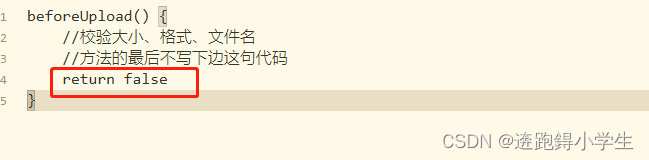
beforeUpload方法除校验外,外层不允许返回return false;
2、js文件
export default {
methods: {
beforeUpload(file) {
console.log("文件", file)
// 上传文件接口额外参数
this.dataObj.businessCode = "ISSUEPOINT";
this.dataObj.salesType = "SALES12"
const { name, size } = file;
const index = name.lastIndexOf('.');
// 判断文件名是否有后缀,没后缀文件错误
if(index === -1) {
this.$notify.error({
title: '错误',
message: '文件错误,请重新上传!',
});
return false;
}
const fileType = name.substr(index + 1);
const acceptFileTypes = ['txt', 'zip', 'rar'];
// 判断文件类型
if(!acceptFileTypes.includes(fileType)) {
this.$notify.error({
title: '错误',
message: '文件类型错误,请重新上传!',
});
return false;
}
// 判断文件大小
if(size > 10*1024*1024) {
this.$notify.error({
title: '错误',
message: '文件大小超过10M,请重新上传!',
});
return false;
}
this.fileLists.push(file)
},
submitUpload() {
//使用ref调用组件本身的submit方法上传文件
this.$refs.uploadRef.submit()
}
}
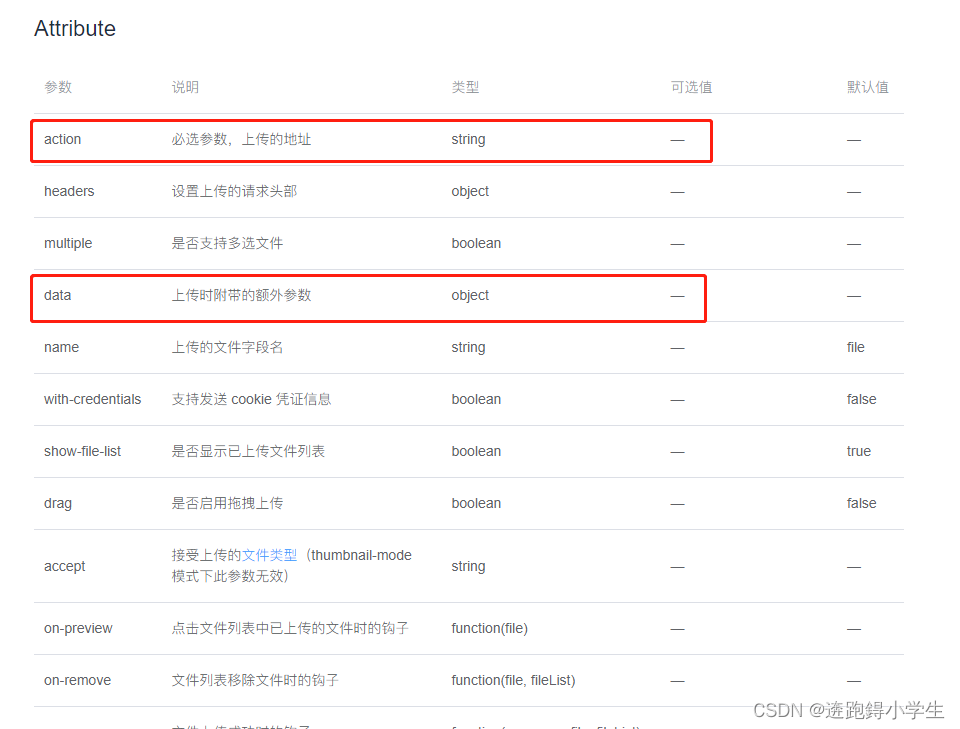
}二、iview upload 组件传送门
1、html文件
<Upload ref="upload" :multiple="true" :action="uploadUrl" :data="fileUploadObj" :before-
   upload="beforeUpload" :on-success="handleSuccess" :auto-upload="false" :show-upload-
  list="false"
>
	<Button>选择文件
		<Icon type="md-arrow-round-up" />
	</Button>
</Upload>
注意:使用iview upload组件调取自身上传方法,beforeUpload方法必须要返回false,和element upload相反
2、js文件
export default {
    methods: {
        beforeUpload(file) {
	        console.log("文件", file)
            // 上传文件接口额外参数
	        this.dataObj.businessCode = "ISSUEPOINT";
	        this.dataObj.salesType = "SALES12"
	        // 上传文件其他的校验方法
            let imgTypeArr = ["image/png", "image/jpg", "image/jpeg","image/gif"]
            let imgType = imgTypeArr.indexOf(file.type) !== -1
            if (!imgType) {
              this.$Message.warning({
                content:  '文件  ' + res.name + '  格式不正确, 请选择格式正确的图片',
                duration: 5

              });
              return false
            }

            // 控制文件上传大小
            let imgSize = localStorage.getItem('file_size_max');
            //获取缓存的文件大小限制字段
            let Maxsize = res.size  < imgSize;
            let fileMax = imgSize/ 1024 / 1024;
            if (!Maxsize) {
              this.$Message.warning({
                content: '文件体积过大,图片大小不能超过' + fileMax + 'M',
                duration: 5
              });
              return false
            }
            this.fileLists.push(file)
            //关键点
            return false
        },
        submitUpload() {
            //使用ref调用组件本身的post方法上传文件
	        let _this = this
			this.fileLists.forEach(n => {
				_this.$refs.upload.post(n)
			})
        }
    }
}
本次组件分享完毕,欢迎小伙伴组团交流~