搭建商城的微服务架构-2
创建实体类
CartAddDTO,代码如下
DTO:前端收集到数据发送给后端的实体
VO:后端从数据库查询出来要发送给前端的实体
@Data
// 定义knife4j在线文档解释文本的注解
@ApiModel("新增购物车商品信息的DTO")
public class CartAddDTO implements Serializable {
@ApiModelProperty(value = "商品编号", name="commodityCode",example = "PC100")
private String commodityCode; // 商品编号
@ApiModelProperty(value = "商品单价", name="price",example = "136")
private Integer price; // 商品单价
@ApiModelProperty(value = "商品数量", name="count",example = "3")
private Integer count; // 商品数量
@ApiModelProperty(value = "用户ID", name="userId",example = "UU100")
private String userId; // 用户ID
}
创建包
pojo.cart.model
包中创建类Cart
@Data
public class Cart implements Serializable {
private Integer id;
// 商品编号
private String commodityCode;
// 价格
private Integer price;
// 数量
private Integer count;
// 用户id
private Integer userId;
}
下面创建订单模块需要的类
pojo.order.dto.OrderAddDTO
@ApiModel("新增订单的DTO")
@Data
public class OrderAddDTO implements Serializable {
    @ApiModelProperty(value = "用户id",name="userId",example = "UU100")
    private String userId;
    @ApiModelProperty(value = "商品编号",name="commodityCode",example = "PC100")
    private String commodityCode;
    @ApiModelProperty(value = "商品数量",name="count",example = "5")
    private Integer count;
    @ApiModelProperty(value = "总金额",name="money",example = "50")
    private Integer money;
}
pojo.order.model.Order
@Data
public class Order implements Serializable {
    private Integer id;
    private String userId;
    private String commodityCode;
    private Integer count;
    private Integer money;
}
最后是库存相关的类
pojo.stock.dto.StockReduceCountDTO
@ApiModel("商品减少库存DTO")
@Data
public class StockReduceCountDTO implements Serializable {
    @ApiModelProperty(value = "商品编号",name="commodityCode",example = "PC100")
    private String commodityCode;
    @ApiModelProperty(value = "减库存数",name="reduceCount",example = "5")
    private Integer reduceCount;
}
pojo.stock.model.Stock
@Data
public class Stock implements Serializable {
    private Integer id;
    private String commodityCode;
    private Integer reduceCount;
}
创建异常相关类
创建包com.taobao.mall.commons.exception
包中创建类MallServiceException
/**
* 业务异常
*/
@Data
@EqualsAndHashCode(callSuper = false)
public class MallServiceException extends RuntimeException {
private ResponseCode responseCode;
public MallServiceException(ResponseCode responseCode, String message) {
super(message);
setResponseCode(responseCode);
}
}
将restful包中用于控制器返回的JsonResult类复制
/**
* 通用响应对象
*/
@Data
public class JsonResult<T> implements Serializable {
/**
* 状态码
*/
@ApiModelProperty(value = "业务状态码", position = 1, example = "200, 400, 401, 403, 404, 409, 500")
private Integer state;
/**
* 消息
*/
@ApiModelProperty(value = "业务消息", position = 2, example = "登录失败!密码错误!")
private String message;
/**
* 数据
*/
@ApiModelProperty(value = "业务数据", position = 3)
private T data;
/**
* 创建响应结果对象,表示"成功",不封装其它任何数据
* @return 响应结果对象
*/
public static JsonResult<Void> ok() {
return ok("OK");
}
public static JsonResult ok(String message){
JsonResult jsonResult=new JsonResult();
jsonResult.setState(ResponseCode.OK.getValue());
jsonResult.setMessage(message);
jsonResult.setData(null);
return jsonResult;
}
/**
* 创建响应结果对象,表示"成功",且封装客户端期望响应的数据
* @param data 客户端期望响应的数据
* @return 响应结果对象
*/
public static <T> JsonResult<T> ok(String message,T data) {
JsonResult<T> jsonResult = new JsonResult<>();
jsonResult.setState(ResponseCode.OK.getValue());
jsonResult.setData(data);
return jsonResult;
}
/**
* 创建响应结果对象,表示"失败",且封装"失败"的描述
*
* @param e MallServiceException异常对象
* @return 响应结果对象
*/
public static JsonResult<Void> failed(CoolSharkServiceException e) {
return failed(e.getResponseCode(), e);
}
/**
* 创建响应结果对象,表示"失败",且封装"失败"的描述
*
* @param responseCode "失败"的状态码
* @param e "失败"时抛出的异常对象
* @return 响应结果对象
*/
public static JsonResult<Void> failed(ResponseCode responseCode, Throwable e) {
return failed(responseCode, e.getMessage());
}
/**
* 创建响应结果对象,表示"失败",且封装"失败"的描述
*
* @param responseCode "失败"的状态码
* @param message "失败"的描述文本
* @return 响应结果对象
*/
public static JsonResult<Void> failed(ResponseCode responseCode, String message) {
JsonResult<Void> jsonResult = new JsonResult<>();
jsonResult.setState(responseCode.getValue());
jsonResult.setMessage(message);
return jsonResult;
}
}
我们编写的所有模块控制层发送异常时,也都由SpringMvc的统一异常处理类来处理
所以commons模块编写统一异常处理类也是常规操作
/**
* 全局异常处理器
*/
@RestControllerAdvice
@Slf4j
public class GlobalControllerExceptionHandler {
/**
* 处理业务异常
*/
@ExceptionHandler({MallServiceException.class})
public JsonResult<Void> handleMallServiceException(MallServiceException e) {
log.debug("出现业务异常,业务错误码={},描述文本={}", e.getResponseCode().getValue(), e.getMessage());
e.printStackTrace();
JsonResult<Void> result = JsonResult.failed(e);
log.debug("即将返回:{}", result);
return result;
}
/**
* 处理绑定异常(通过Validation框架验证请求参数时的异常)
*/
@ExceptionHandler(BindException.class)
public JsonResult<Void> handleBindException(BindException e) {
log.debug("验证请求数据时出现异常:{}", e.getClass().getName());
e.printStackTrace();
String message = e.getBindingResult().getFieldError().getDefaultMessage();
JsonResult<Void> result = JsonResult.failed(ResponseCode.BAD_REQUEST, message);
log.debug("即将返回:{}", result);
return result;
}
/**
* 处理系统(其它)异常
*/
@ExceptionHandler({Throwable.class})
public JsonResult<Void> handleSystemError(Throwable e) {
log.debug("出现系统异常,异常类型={},描述文本={}", e.getClass().getName(), e.getMessage());
e.printStackTrace();
JsonResult<Void> result = JsonResult.failed(ResponseCode.INTERNAL_SERVER_ERROR, e);
log.debug("即将返回:{}", result);
return result;
}
}
commons模块内容编写暂时告一段落
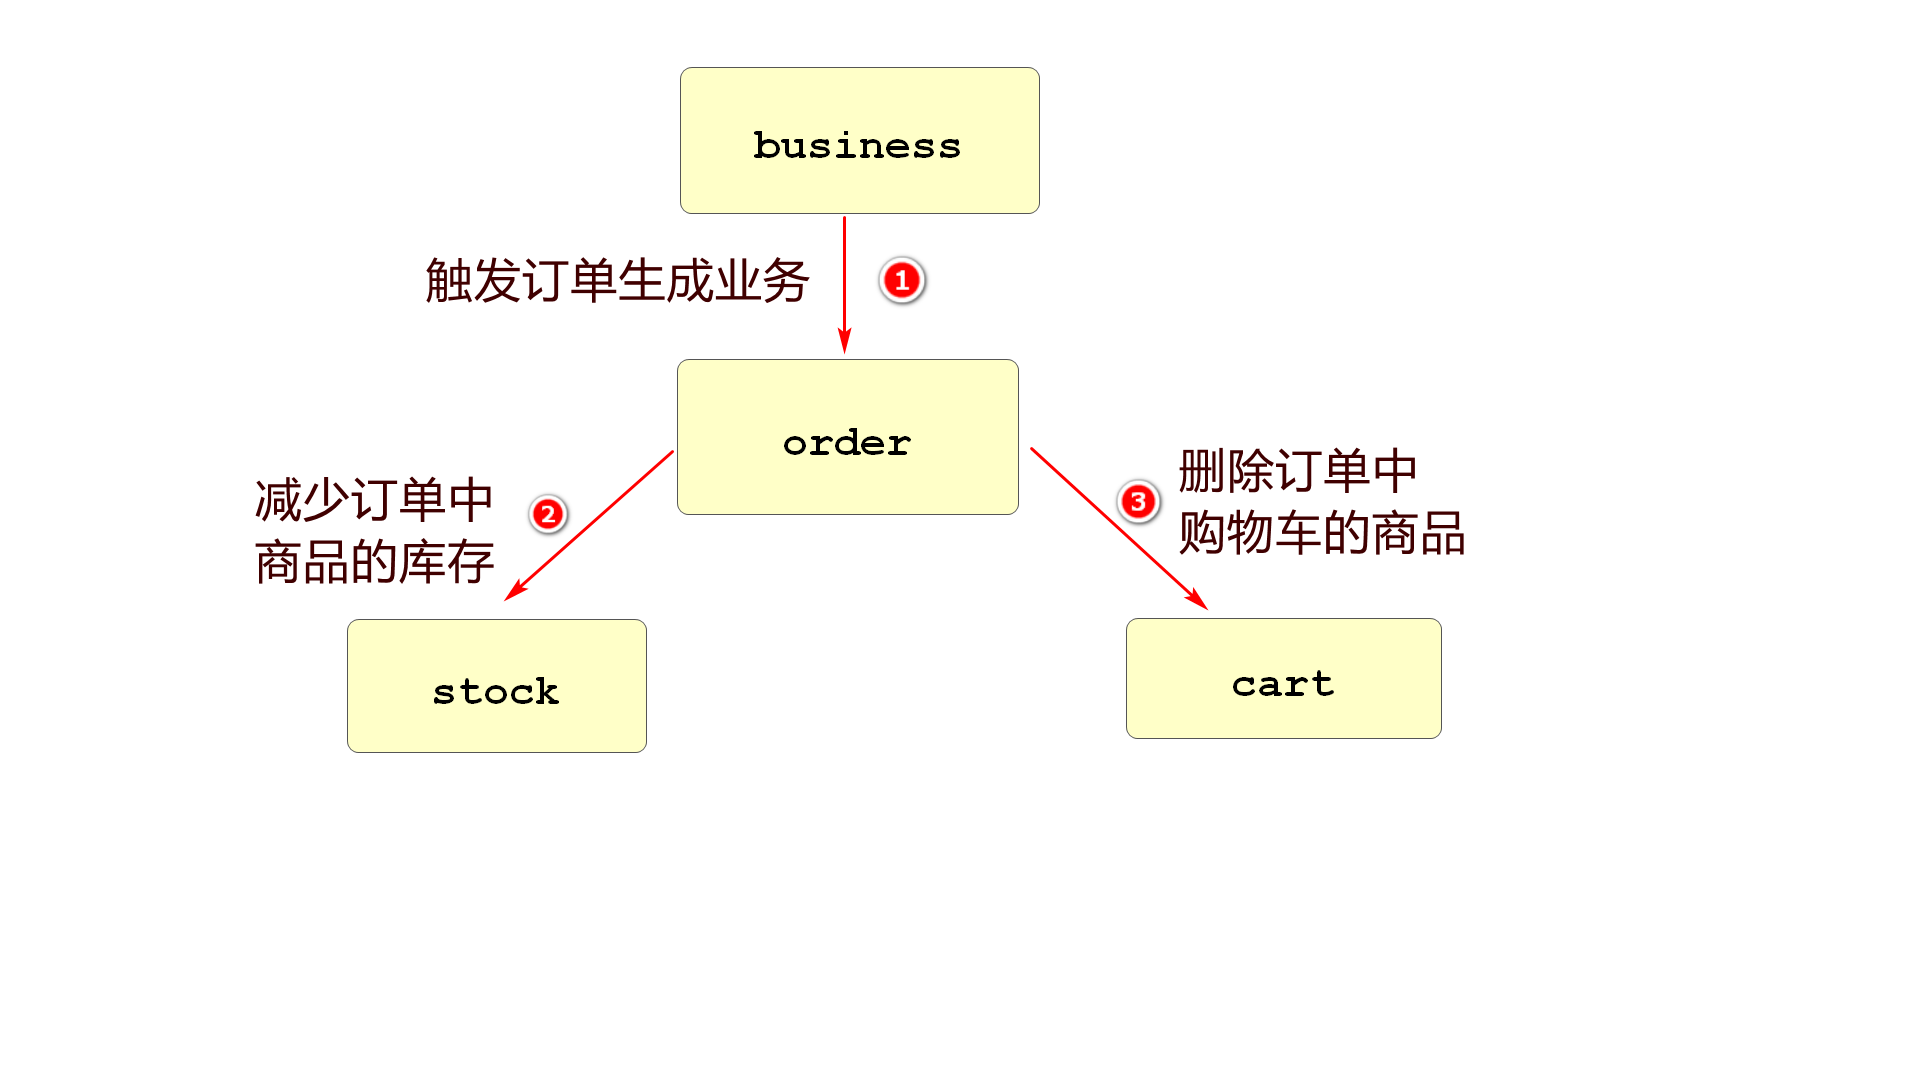
创建business模块
business:商业生意业务的意思
这个模块创建出来是为了触发订单业务的
创建项目
创建子项目mall-business
父子相认
子项目pom文件
<?xml version="1.0" encoding="UTF-8"?> <project xmlns="http://maven.apache.org/POM/4.0.0" xmlns:xsi="http://www.w3.org/2001/XMLSchema-instance" xsi:schemaLocation="http://maven.apache.org/POM/4.0.0 https://maven.apache.org/xsd/maven-4.0.0.xsd"> <modelVersion>4.0.0</modelVersion> <parent> <groupId>com.mall</groupId> <artifactId>mall</artifactId> <version>0.0.1-SNAPSHOT</version> <relativePath/> <!-- lookup parent from repository --> </parent> <groupId>com.mall</groupId> <artifactId>mall-business</artifactId> <version>0.0.1-SNAPSHOT</version> <name>mall-business</name> <description>Demo project for Spring Boot</description> <dependencies> <dependency> <groupId>org.springframework.boot</groupId> <artifactId>spring-boot-starter-web</artifactId> </dependency> <dependency> <groupId>com.github.xiaoymin</groupId> <artifactId>knife4j-spring-boot-starter</artifactId> </dependency> <dependency> <groupId>com.taobao</groupId> <artifactId>mall-commons</artifactId> <version>0.0.1-SNAPSHOT</version> </dependency> </dependencies> </project>
配置yml
yml文件配置数据源
spring:
  datasource:
    url: jdbc:mysql://localhost:3306/csmall_db?useSSL=false&useUnicode=true&characterEncoding=utf-8
    username: root
    password: root
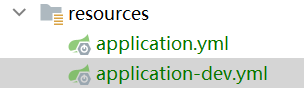
配置business模块application.yml文件
yml文件内容如下
server:
  port: 20000
#公共配置
mybatis:
  configuration:
    cache-enabled: false   # 不启用mybatis缓存
    map-underscore-to-camel-case: true # 映射支持驼峰命名法
    log-impl: org.apache.ibatis.logging.stdout.StdOutImpl # 将运行的sql输出到控制台
knife4j:
  # 开启增强配置
  enable: true
  # 生产环境屏蔽,开启将禁止访问在线API文档
  production: false
  # Basic认证功能,即是否需要通过用户名、密码验证后才可以访问在线API文档
  basic:
    # 是否开启Basic认证
    enable: false
    # 用户名,如果开启Basic认证却未配置用户名与密码,默认是:admin/123321
    username: root
    # 密码
    password: root
spring:
  profiles:
    active: dev
我们在配置末尾看到了
spring:
  profiles:
    active: dev
上面的配置含义是让SpringBoot读取额外配置文件
我们参数值编写的是dev,那么springBoot会读取application-dev.yml
dev是可以随意修改的名字,没有任何固定要求
SpringBoot相关配置
创建config包,编写一些必要配置
首先创建CommonsConfiguration
// 只有添加了@Configuration才能配置当前Spring环境
@Configuration
// 扫描commons模块的统一异常处理类,使其在项目中生效
@ComponentScan("cn.tedu.csmall.commons.exception")
public class CommonsConfiguration {
}
开发business的业务代码
因为business模块是业务的触发者,所以不需要数据库操作,直接编写业务逻辑层即可
创建service包,包中创建IBusinessService接口
代码如下
public interface IBusinessService {

    // 定义触发新增订单模块功能的方法
    void buy();
}
新建service.impl包
包中创建BusinessServiceImpl类
代码如下
@Service
@Slf4j
public class BusinessServiceImpl implements IBusinessService {
    @Override
    public void buy() {
        // 模拟购买业务
        // 创建用于新增订单的DTO实体OrderAddDTO
        OrderAddDTO orderAddDTO=new OrderAddDTO();
        // 为orderAddDTO赋值
        orderAddDTO.setUserId("UU100");
        orderAddDTO.setCommodityCode("PC100");
        orderAddDTO.setCount(5);
        orderAddDTO.setMoney(500);
        // 因为是模拟购买,现在还不能调用order模块,所以只是输出
        log.info("新增订单的信息为:{}",orderAddDTO);
    }
}
创建控制层controller
创建类BusinessController代码如下
@RestController
@RequestMapping("/base/business")
// knife4j控制器描述
@Api(tags = "新增订单业务触发")
public class BusinessController {
@Autowired
private IBusinessService businessService;
@PostMapping("/buy")
// localhost:20000/base/business/buy(必须是post请求,浏览器输入地址无效)
@ApiOperation("执行触发的方法")
public JsonResult buy(){
// 调用业务逻辑层的方法
businessService.buy();
return JsonResult.ok("购买完成!");
}
}
启动当前business项目
访问