局域网搭建https 安全证书
本地录屏功能要求必须使用https访问,导致本来是内网的应用,必须使用https访问,无奈。
因此使用最简单的https ca安全证书搭建,记录如下。
Linux下生成HTTPS证书申请与颁发方法:
(1)生成HTTPS证书,可以使用openssl生成服务器RSA密钥及证书,生成的命令如下:
openssl genrsa -des3 -out server.key 1024
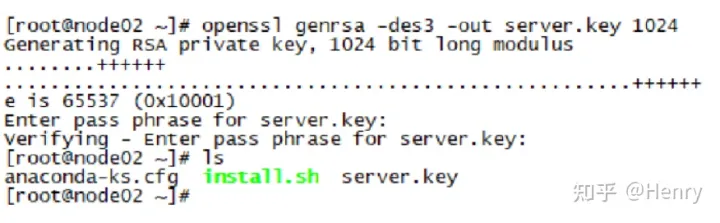
密码我使用的最简单的 1234
(2)创建签名请求的证书(CSR),如下:
openssl req -new -key server.key -out server.csr
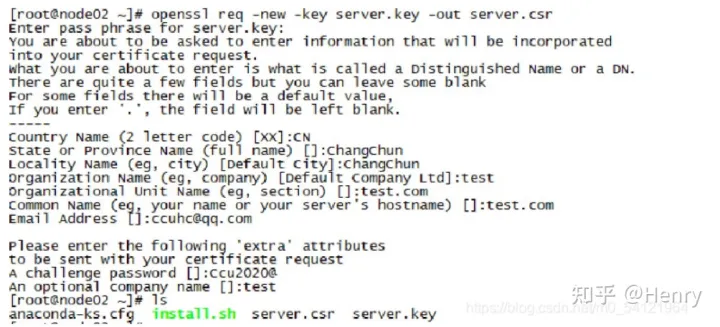
地址等等随便空着就行
(3)加载SSL支持的Nginx并使用私钥时去除口令,如下:
cp server.key server.key.bak
openssl rsa -in server.key.bak -out server.key

(4)自动签发证书,如下:
openssl x509 -req -days 10240 -in server.csr -signkey server.key -out server.crt
Nginx配置反向代理:
以我当前项目为例:
server {

		#端口
		listen       443 ssl;
		#多个server的name不能重名 改成自己系统的
		server_name  localhost;
		client_max_body_size 200m;

		ssl_certificate      /root/server.crt;  # 这个是证书的crt文件所在目录
		ssl_certificate_key  /root/server.key; # 这个是证书key文件所在目录
		ssl_session_cache    shared:SSL:1m;
		ssl_session_timeout  5m;

		ssl_ciphers  HIGH:!aNULL:!MD5;
		ssl_prefer_server_ciphers  on;


		location / {
			proxy_pass http://localhost;
		}

		location /base/ {
			proxy_pass http://localhost:9000/;
		}
	}
重启nginx之后即可,不过链接会提醒不安全以及标红,这个暂时无法解决,牵扯到操作系统底层的东西,因为底层都是国外的,而安全证书的根证书目前操作系统只认国外的几个公司,因此局域网的安全证书暂时无法解决。
若提示
nginx: [emerg] the "ssl" parameter requires ngx_http_ssl_module in /usr/local/nginx/conf/nginx.conf:
则表示nginx未安装ssl模块,需要安装ssl
进入到nginx安装文件
/home/export/servers/nginx-1.19.9查看配置文件
/usr/local/nginx/sbin/nginx -V
在configure arguments:后面显示的原有的configure参数如下:
--prefix=/usr/local/nginx --with-http_stub_status_module那么我们的新配置信息就应该这样写:
./configure --prefix=/usr/local/nginx --with-http_stub_status_module --with-http_ssl_module运行上面的命令即可,等配置完
配置完成后,运行命令
make这里不要进行make install,否则就是覆盖安装
然后备份原有已安装好的nginx
cp /usr/local/nginx/sbin/nginx /usr/local/nginx/sbin/nginx.bak然后将刚刚编译好的nginx覆盖掉原有的nginx(这个时候nginx要停止状态)
cp ./objs/nginx /usr/local/nginx/sbin/然后启动nginx,仍可以通过命令查看是否已经加入成功
/usr/local/nginx/sbin/nginx -V 