【Unity】图解 碰撞检测函数,一看就懂!(OnCollisionEnter、OnCollisionStay、OnCollisionExit、OnTriggerEnter......)
1.物理碰撞检测响应函数
现有:
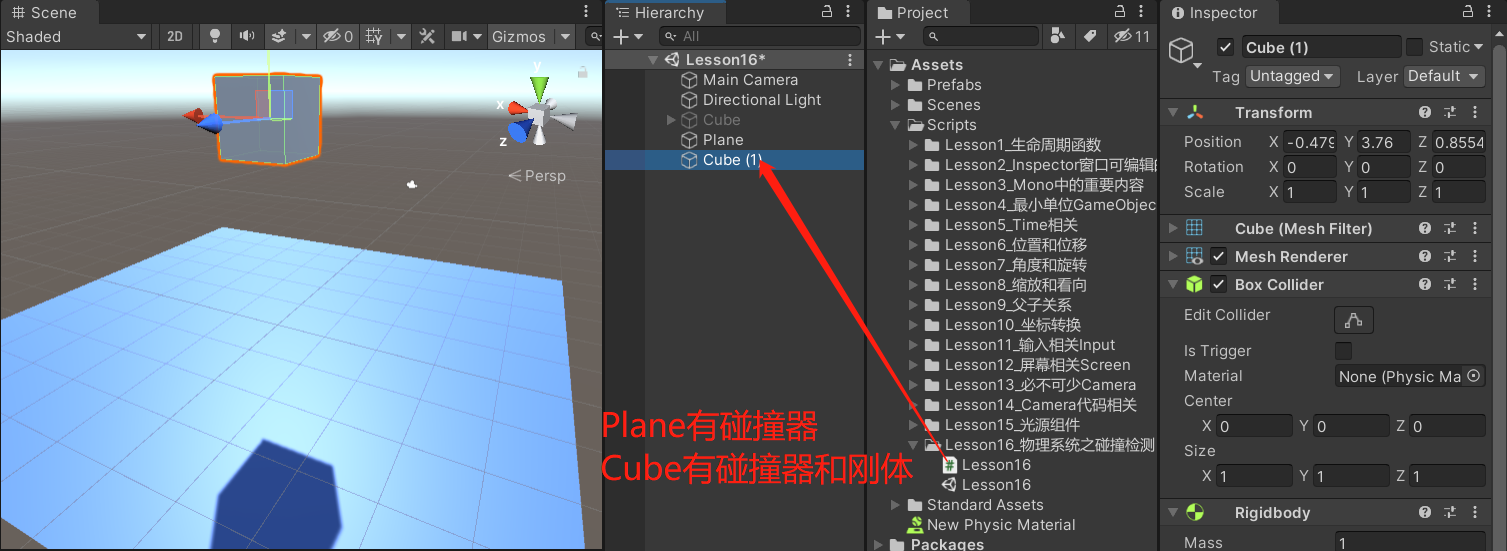
Lesson16脚本的代码:
using System.Collections;
using System.Collections.Generic;
using UnityEngine;
public class Lesson16 : MonoBehaviour
{
    //1.碰撞发生时 自动执行此函数
    //参数 Collision 就是碰到"我"的那个对象
    private void OnCollisionEnter(Collision collision)
    {
        //Collision的关键信息:
        //1.得到Collision的碰撞器:collision.collider
        //2.得到Collision依附的对象:collision.gameObject
        //3.得到Collision依附的对象的位置信息:collision.transform
        //4.得到我们俩有多少个接触点:collision.contactCount
        //  得到各个接触点的具体信息:ContactPoint[] pos = collision.contacts;
        print(this.name + "被" + collision.gameObject.name + "碰撞了");
    }

    //2.碰撞持续时 自动循环执行此函数
    private void OnCollisionStay(Collision collision)
    {
        print(this.name + "和" + collision.gameObject.name + "持续碰撞中");
    }

    //3.碰撞结束时 自动执行此函数
    private void OnCollisionExit(Collision collision)
    {
        print(this.name + "和" + collision.gameObject.name + "分离了");
    }
}
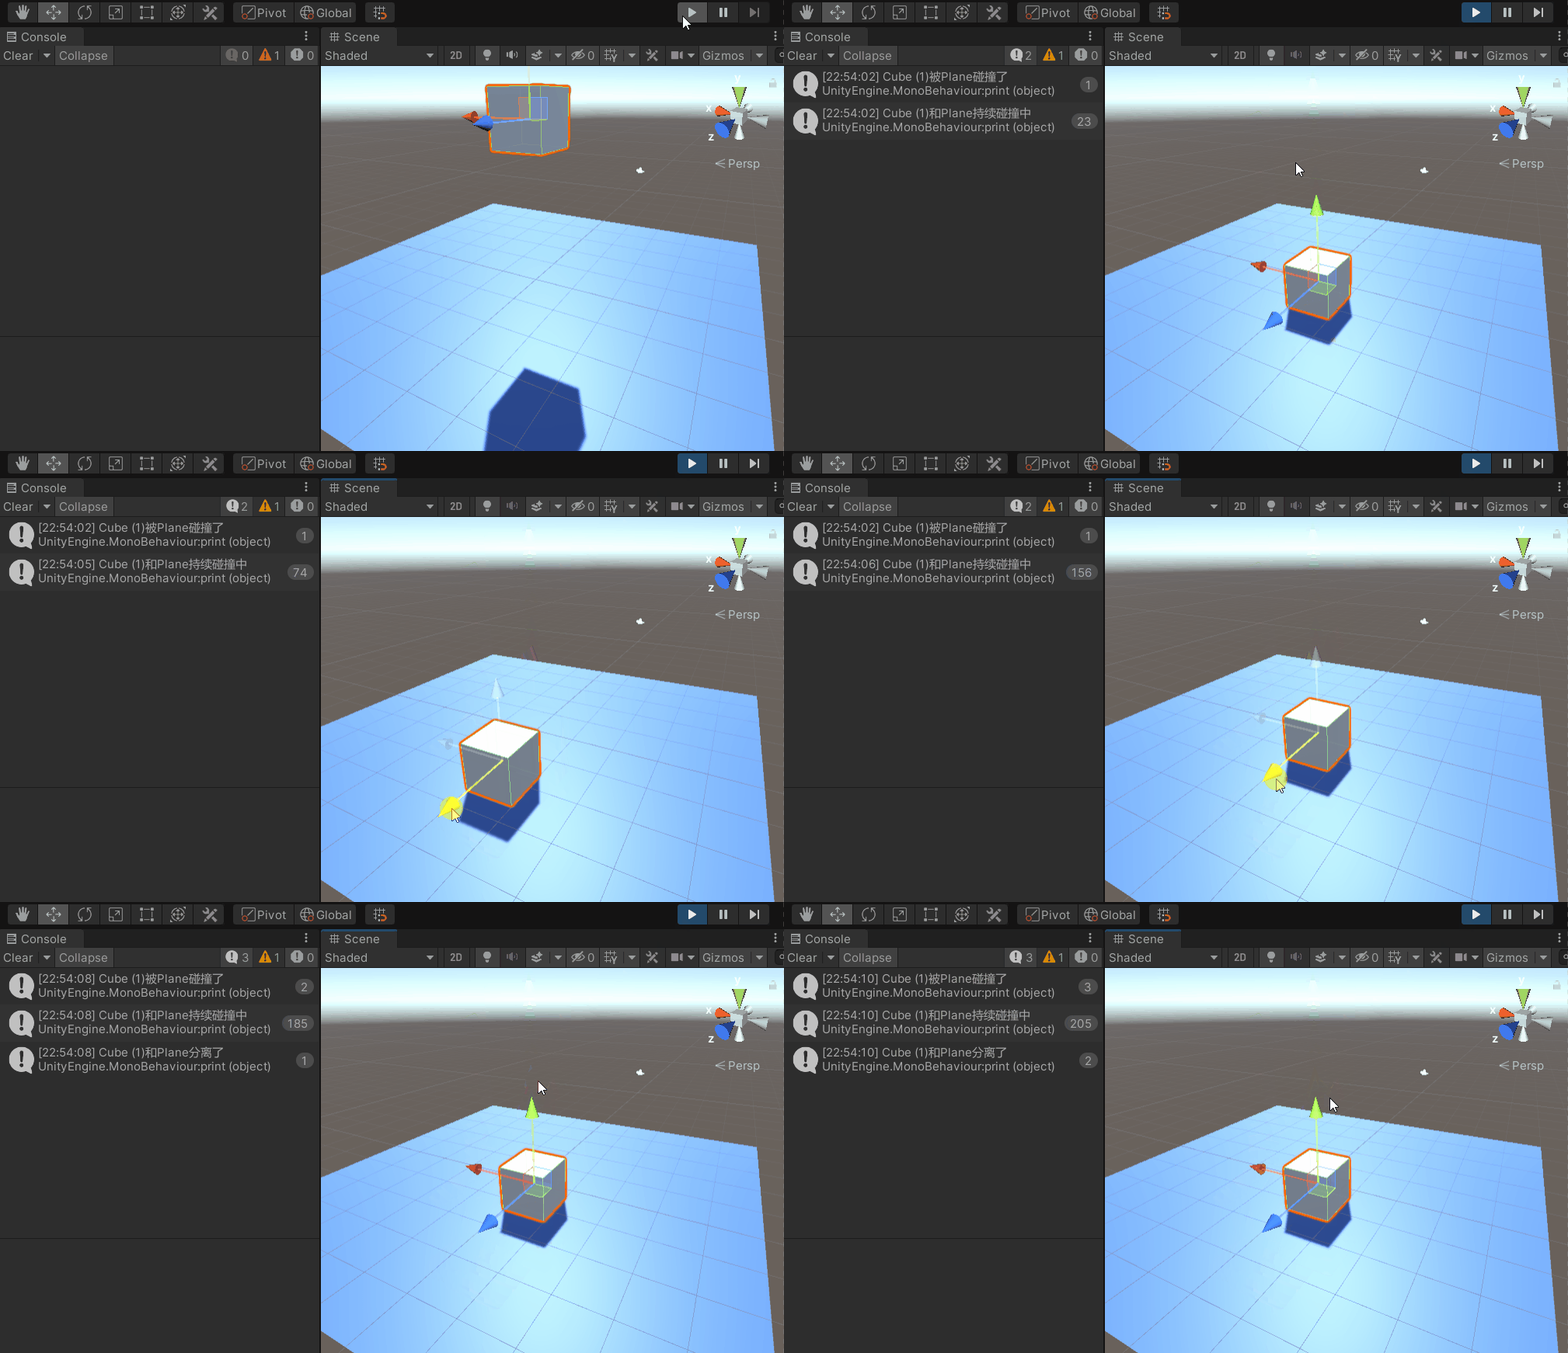
运行:
2.触发器检测响应函数
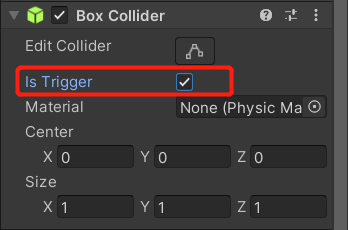
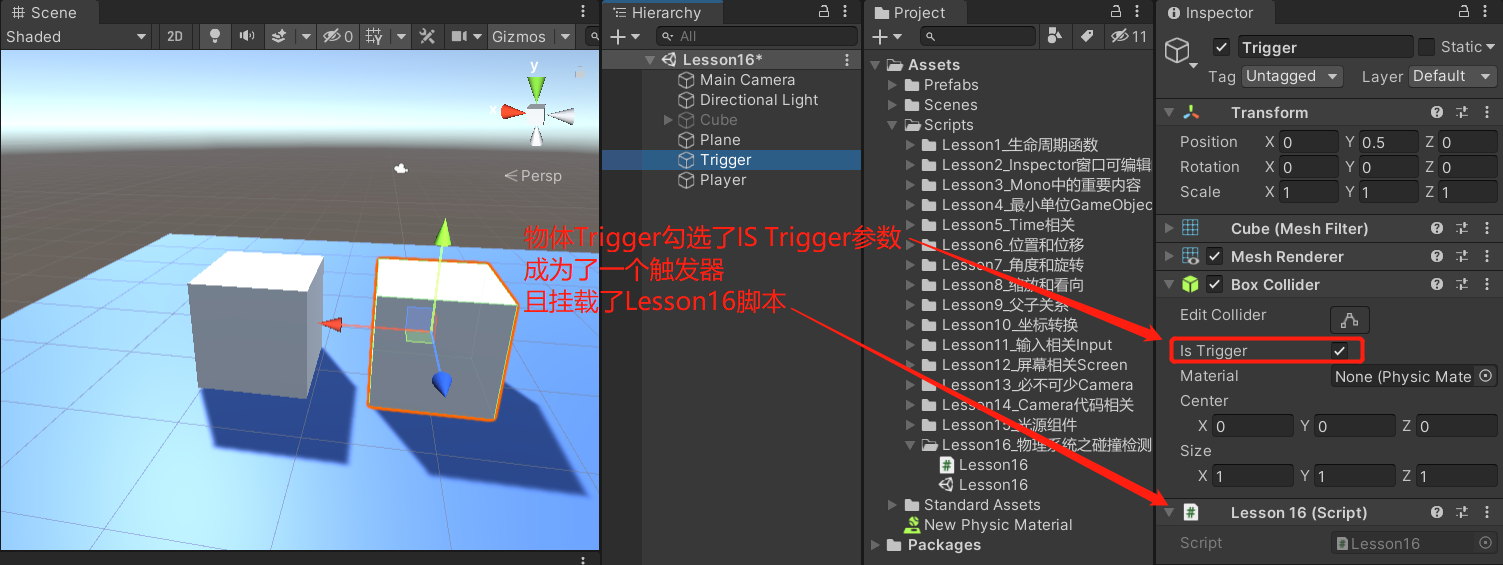
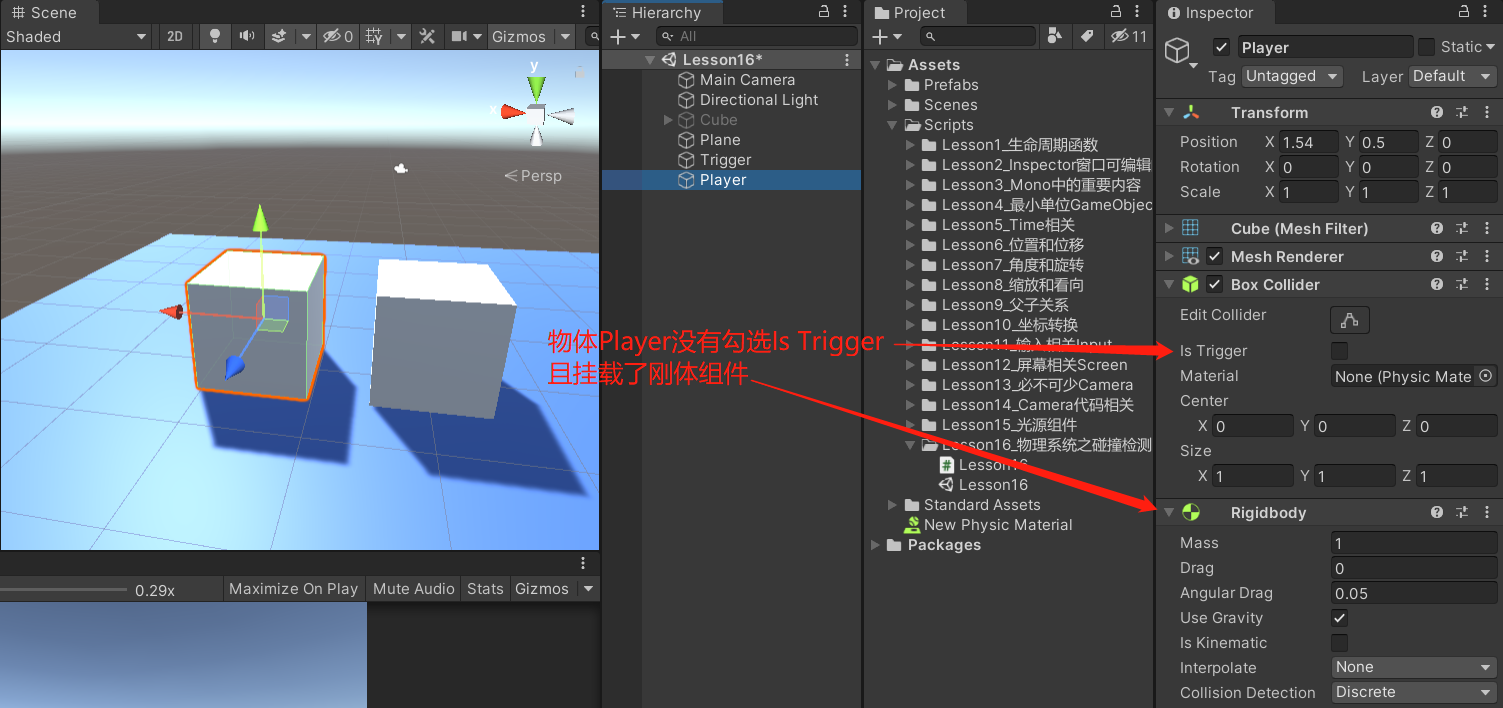
何为触发器:勾选了碰撞器的Is Trigger参数,这个游戏物体就会变成一个触发器
现有:
Lesson16脚本的代码:
using System.Collections;
using System.Collections.Generic;
using UnityEngine;

public class Lesson16 : MonoBehaviour
{
    //1.接触发生时 自动调用此函数
    //参数 Collider 是碰到我的那个对象的碰撞器
    private void OnTriggerEnter(Collider other)
    {
        print(this.name + "被" + other.gameObject.name + "触发了");
    }

    //2.两者水乳相容 自动循环调用此函数
    private void OnTriggerStay(Collider other)
    {
        print(this.name + "和" + other.gameObject.name + "水乳相容中");
    }

    //3.两者分离时 自动调用此函数
    private void OnTriggerExit(Collider other)
    {
        print(this.name + "和" + other.gameObject.name + "分离了");
    }
}
运行:
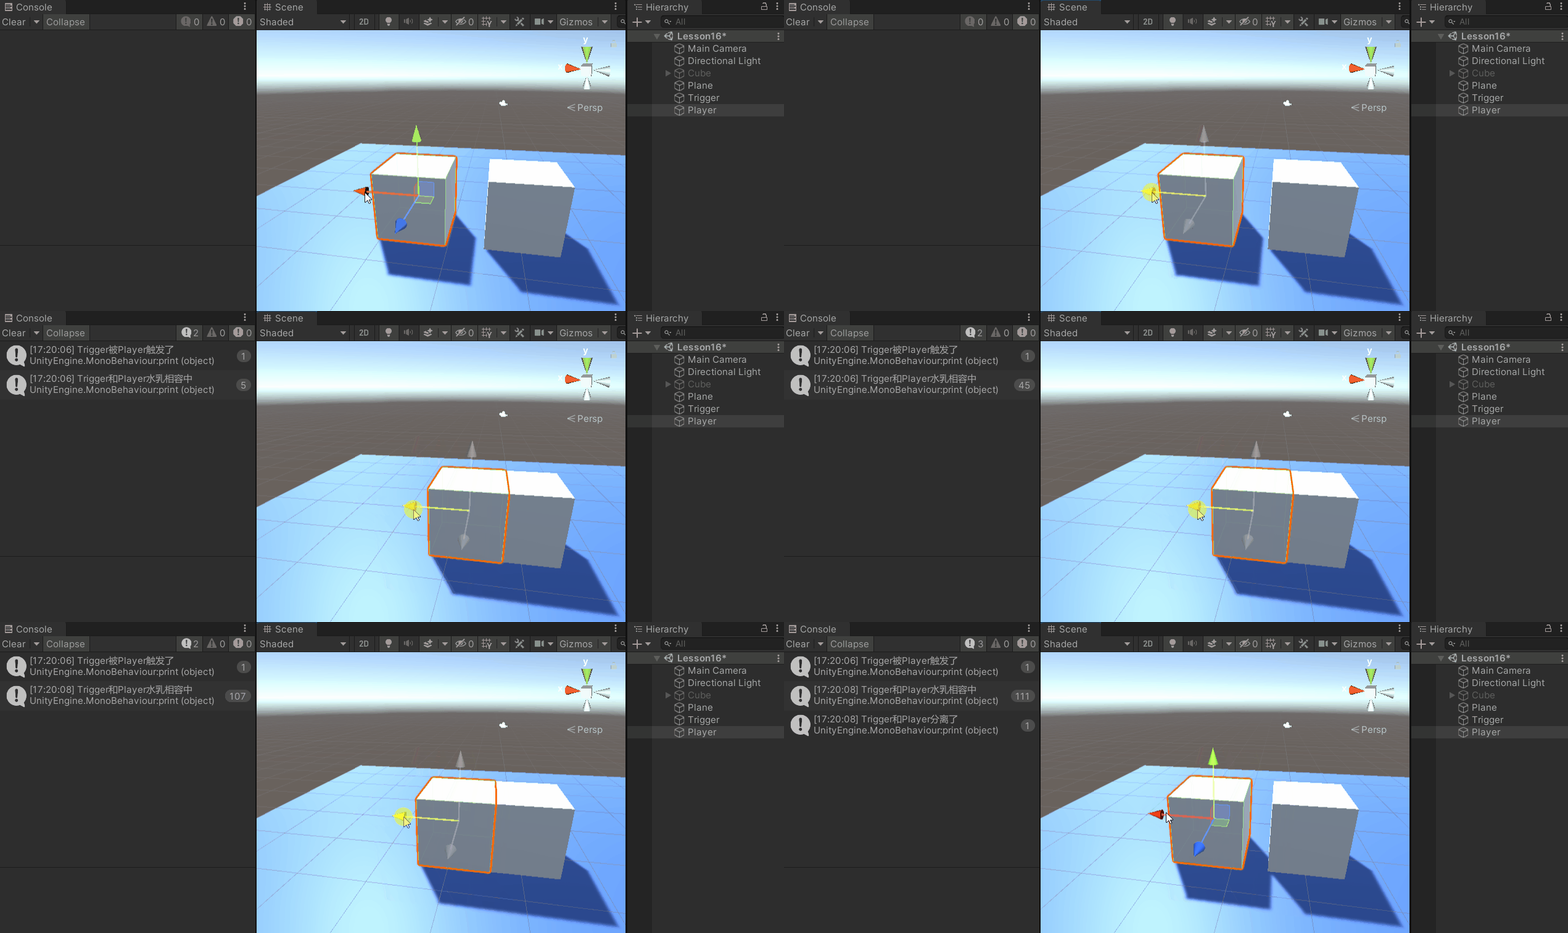
3.明确什么时候会响应函数?
1.只要脚本挂载的对象 能和别的物体产生碰撞或触发,那么上面那六个函数就能够被相应
(有物理效果的相应的是"物理碰撞检测响应函数",有触发效果的相应的是"触发器检测响应函数")
2.如果是一个异形物体,刚体在父对象上,如果想通过子对象身上挂脚本来检测碰撞是行不通的
必须挂载到这个带刚体的父对象上才行
3.要明确 物理碰撞相应和触发器相应的区别
4.碰撞和触发器函数都可以写成虚函数,在子类中被重写
using System.Collections;
using System.Collections.Generic;
using UnityEngine;

public class Lesson16 : MonoBehaviour
{
    //注意:访问修饰符需要写成 protected
    //     没必要写成public,因为不需要自己手动调用
    protected virtual void OnTriggerEnter(Collider other)
    {
        print(this.name + "被" + other.gameObject.name + "触发了");
    }
}