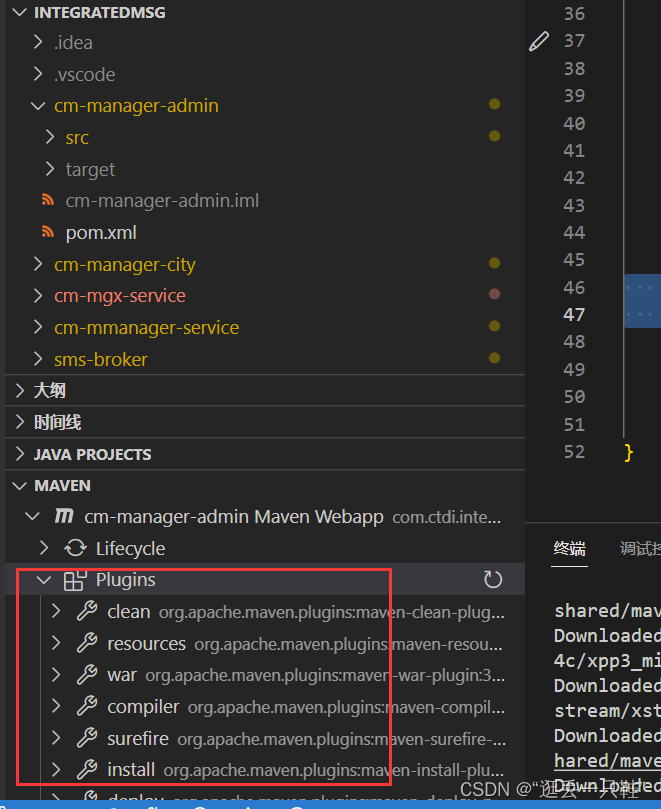
使用VSCode实现Java项目管理 Maven相关插件及配置(Maven换源)
前言
之前一直使用VSCode开发C、Go两种语言,现在需要对java进行学习,面对java的idea工具相对陌生,依旧想继续使用vscode作为开发工具,因此有了本篇文章
插件
无论是idea还是vscode,最核心的功能可能就是编辑了,很多工具的优秀特性也都是来自于优秀的插件,因此首先需要配置VSCode的插件
- Language Support for Java™ by Red Hat
- Debugger for Java
- Java Test Runner
- Maven for Java
- Java Dependency Viewer
- Spring Boot Tools
- Spring Initializr Java Support
- Spring Boot Dashboard
- Tomcat
- Jetty
- CheckStyle
- Java Linter
- Java Decompiler
- Lombok Annotations Support
- Java Properties

Maven配置
一、maven的安装
首先,先到官网去下载maven。这里是官网的地址:http://maven.apache.org/download.cgi 请选择最新的版本下载:

解压
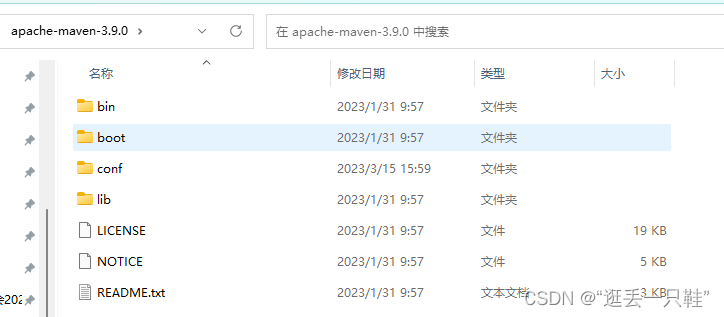
二、路径配置
右键“计算机”,选择“属性”,之后点击“高级系统设置”,点击“环境变量”,来设置环境变量
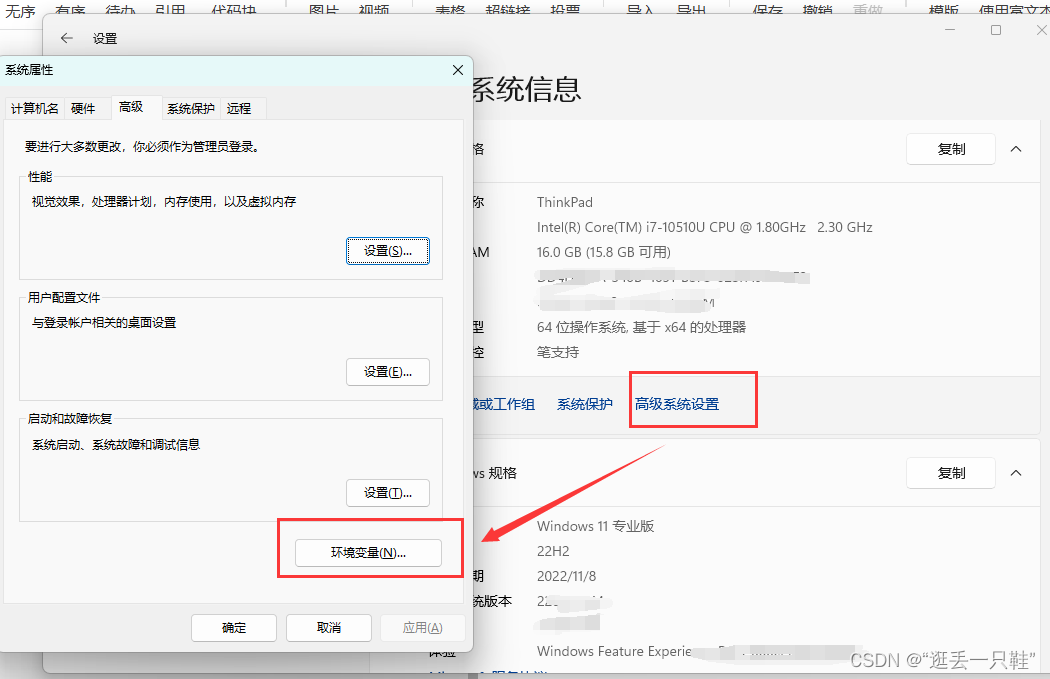
有以下系统变量需要配置:
新建
变量名   MAVEN_HOME

变量值:D:Program Filesapache-maven-3.9.0
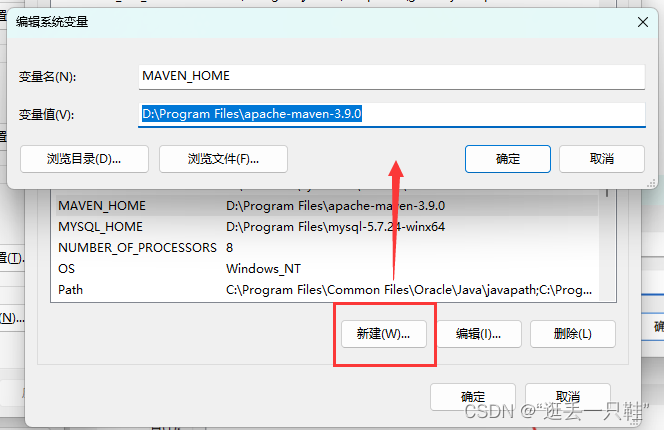
编辑系统变量 Path 添加变量值:
%MAVEN_HOME%bin
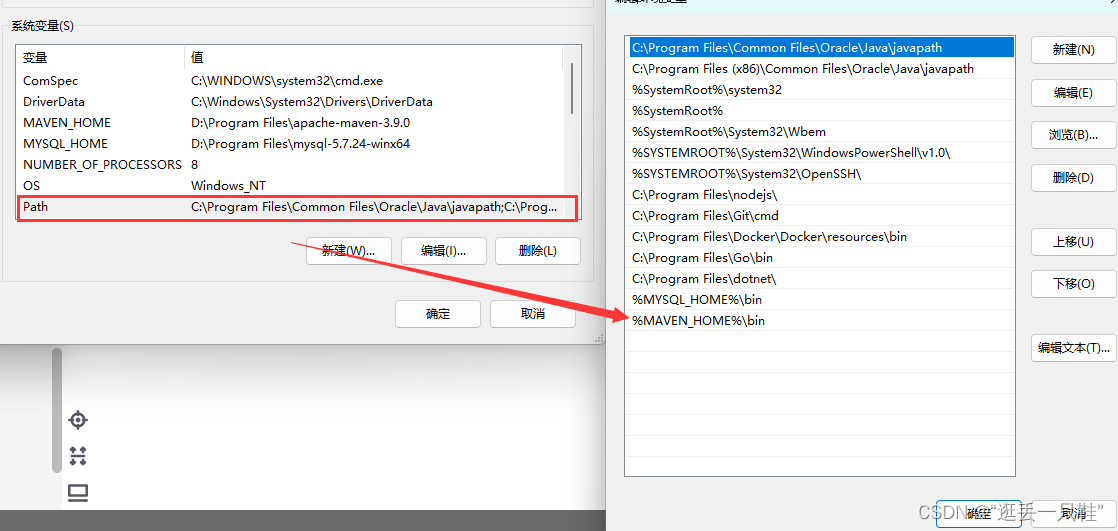
最后检验配置是否成功:用win键+R,来打开命令行提示符窗口,即Dos界面,输入
mvn -version
若出现以下情况说明配置成功

三、修改Maven依赖下载源
1、首先打开自己的maven安装目录,下面找到conf文件夹,打开settings.xml文件

2、直接复制下面的内容覆盖,切换为阿里源
<?xml version="1.0" encoding="UTF-8"?>
<settings xmlns="http://maven.apache.org/SETTINGS/1.0.0"
          xmlns:xsi="http://www.w3.org/2001/XMLSchema-instance"
          xsi:schemaLocation="http://maven.apache.org/SETTINGS/1.0.0 http://maven.apache.org/xsd/settings-1.0.0.xsd">
    <!-- localRepository
     | The path to the local repository maven will use to store artifacts.
     |
     | Default: ${user.home}/.m2/repository
    <localRepository>/path/to/local/repo</localRepository>
    -->
    <mirrors>
        <!-- mirror
         | Specifies a repository mirror site to use instead of a given repository. The repository that
         | this mirror serves has an ID that matches the mirrorOf element of this mirror. IDs are used
         | for inheritance and direct lookup purposes, and must be unique across the set of mirrors.
         |
        <mirror>
          <id>mirrorId</id>
          <mirrorOf>repositoryId</mirrorOf>
          <name>Human Readable Name for this Mirror.</name>
          <url>http://my.repository.com/repo/path</url>
        </mirror>
         -->

        <mirror>
            <id>alimaven</id>
            <name>aliyun maven</name>
            <url>http://maven.aliyun.com/nexus/content/groups/public/</url>
            <mirrorOf>central</mirrorOf>
        </mirror>

        <mirror>
            <id>uk</id>
            <mirrorOf>central</mirrorOf>
            <name>Human Readable Name for this Mirror.</name>
            <url>http://uk.maven.org/maven2/</url>
        </mirror>

        <mirror>
            <id>CN</id>
            <name>OSChina Central</name>
            <url>http://maven.oschina.net/content/groups/public/</url>
            <mirrorOf>central</mirrorOf>
        </mirror>

        <mirror>
            <id>nexus</id>
            <name>internal nexus repository</name>
            <!-- <url>http://192.168.1.100:8081/nexus/content/groups/public/</url>-->
            <url>http://repo.maven.apache.org/maven2</url>
            <mirrorOf>central</mirrorOf>
        </mirror>

    </mirrors>
</settings>
四、修改库文件路径
maven作为非常强大的一个组织和管理工具,但是它的默认仓库放在C盘文档目录下,这样万一重装电脑会将下载的
jar包全部消除,而且永久以后库文件积累太多,容易造成电脑缓慢。对于项目来说重新部署虽然不是难事,但是我们
可以做到将仓库搬到另一个位置,这样就可以一劳永逸了。
使用ctrl+f在settings.xml寻找localrepository字样,出现如下所示,下面将这个标签改为你想要的路径:

例如
<localRepository>D:/Program Files/apache-maven-repository/repository</localRepository>
完整settings.xml
<?xml version="1.0" encoding="UTF-8"?>
<settings xmlns="http://maven.apache.org/SETTINGS/1.0.0"
          xmlns:xsi="http://www.w3.org/2001/XMLSchema-instance"
          xsi:schemaLocation="http://maven.apache.org/SETTINGS/1.0.0 http://maven.apache.org/xsd/settings-1.0.0.xsd">
    <!-- localRepository
     | The path to the local repository maven will use to store artifacts.
     |
     | Default: ${user.home}/.m2/repository
    <localRepository>/path/to/local/repo</localRepository>
    -->
    <localRepository>D:/Program Files/apache-maven-repository/repository</localRepository>
    <mirrors>
        <!-- mirror
         | Specifies a repository mirror site to use instead of a given repository. The repository that
         | this mirror serves has an ID that matches the mirrorOf element of this mirror. IDs are used
         | for inheritance and direct lookup purposes, and must be unique across the set of mirrors.
         |
        <mirror>
          <id>mirrorId</id>
          <mirrorOf>repositoryId</mirrorOf>
          <name>Human Readable Name for this Mirror.</name>
          <url>http://my.repository.com/repo/path</url>
        </mirror>
         -->

        <mirror>
            <id>alimaven</id>
            <name>aliyun maven</name>
            <url>http://maven.aliyun.com/nexus/content/groups/public/</url>
            <mirrorOf>central</mirrorOf>
        </mirror>

        <mirror>
            <id>uk</id>
            <mirrorOf>central</mirrorOf>
            <name>Human Readable Name for this Mirror.</name>
            <url>http://uk.maven.org/maven2/</url>
        </mirror>

        <mirror>
            <id>CN</id>
            <name>OSChina Central</name>
            <url>http://maven.oschina.net/content/groups/public/</url>
            <mirrorOf>central</mirrorOf>
        </mirror>

        <mirror>
            <id>nexus</id>
            <name>internal nexus repository</name>
            <!-- <url>http://192.168.1.100:8081/nexus/content/groups/public/</url>-->
            <url>http://repo.maven.apache.org/maven2</url>
            <mirrorOf>central</mirrorOf>
        </mirror>

    </mirrors>
</settings>
创建你在settings.xml中指定真实仓库路径,并将修改后的settings.xml文件复制一份放在当前的目录下(原来的不要删除掉)

五、配置VSCode
(Ctrl+,) ,搜索
java.configuration.maven
输入maven的settings.xml路径
注意:这里的路径都是之前新建的依赖下载位置的路径
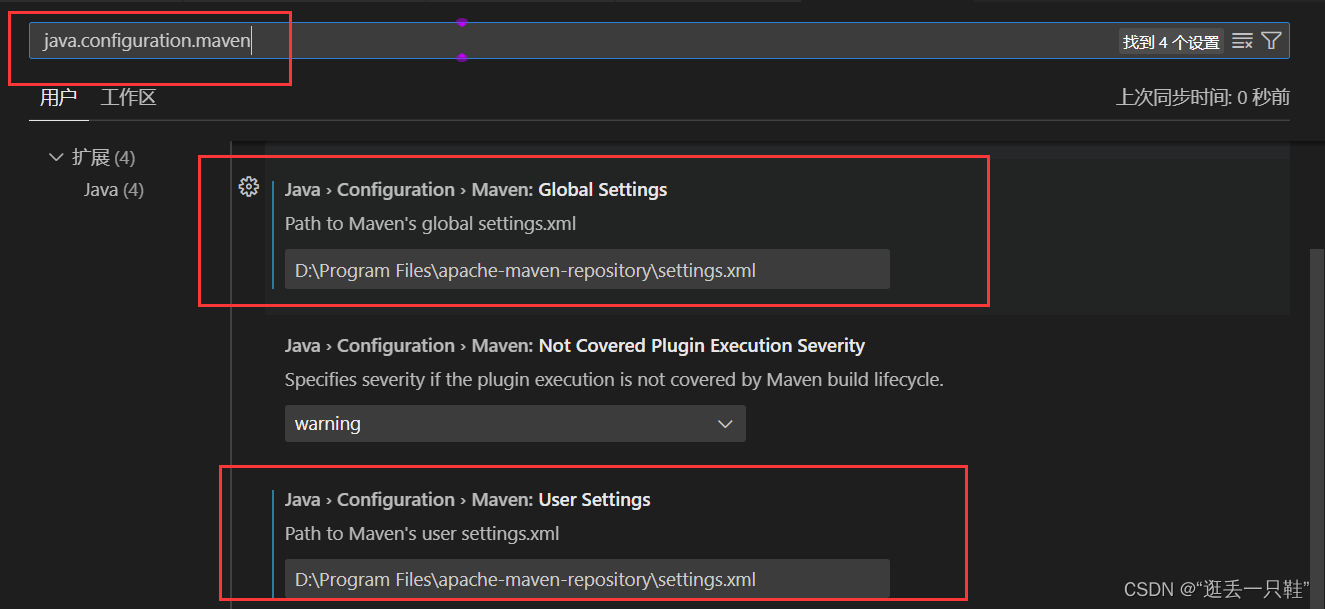
搜索
maven.executable.path

注意:这里填写的路径是mvn可执行文件的绝对路径
上述过程也可以直接添加json代码到setting中
"java.configuration.maven.globalSettings": "D:\Program Files\apache-maven-repository\settings.xml",
"java.configuration.maven.userSettings": "D:\Program Files\apache-maven-repository\settings.xml",
"maven.executable.path": "D:\Program Files\apache-maven-3.9.0\bin\mvn",
Maven使用
经过我们的不屑努力,现在就可以通过vscode实现对maven的管理了
