Mac下载安装Redis以及配置
Mac安装Redis
使用Homebrew安装Redis
1、安装HomeBrew之前,需要你安装Node.js和npm。这里去Node.js官网下载16.20.0版本的或者之前的也可以,但是18和以后的一些版本,项目是跑不起来的。
node-v16.20.0
安装之后,会自动安装Node.js和npm管理工具:
在终端中可以通过node -v 或者 npm -v查看版本号,npm安装成功之后,
首先安装npm,我们安装完了,下面安装安装Homebrew,执行以下命令行,时间可能有点长,期间需要两次输入选择的源和你的Mac开机密码,最后提示安装成功,需要重启终端既可以了:
/bin/zsh -c "$(curl -fsSL https://gitee.com/cunkai/HomebrewCN/raw/master/Homebrew.sh)"注意双引号不要误删了。
完了,重新打开终端输入以下命令,安装Redis:
brew install redis等待下载一会后,弹出如下信息,即安装Redis成功:
Last login: Thu Apr 20 21:39:59 on ttys000
macbookpro@MacBookdeMacBook-Pro ~ % brew install redis
==> Downloading https://formulae.brew.sh/api/formula.jws.json
######################################################################### 100.0%
==> Downloading https://formulae.brew.sh/api/cask.jws.json
######################################################################### 100.0%
==> Fetching dependencies for redis: ca-certificates and openssl@1.1
==> Fetching ca-certificates
==> Downloading https://mirrors.aliyun.com/homebrew/homebrew-bottles/ca-certific
######################################################################### 100.0%
==> Fetching openssl@1.1
==> Downloading https://mirrors.aliyun.com/homebrew/homebrew-bottles/openssl%401
######################################################################### 100.0%
==> Fetching redis
==> Downloading https://mirrors.aliyun.com/homebrew/homebrew-bottles/redis-7.0.1
######################################################################### 100.0%
==> Installing dependencies for redis: ca-certificates and openssl@1.1
==> Installing redis dependency: ca-certificates
==> Pouring ca-certificates-2023-01-10.all.bottle.tar.gz
==> Regenerating CA certificate bundle from keychain, this may take a while...
?  /usr/local/Cellar/ca-certificates/2023-01-10: 3 files, 216.8KB
==> Installing redis dependency: openssl@1.1
==> Pouring openssl@1.1-1.1.1t.big_sur.bottle.tar.gz
?  /usr/local/Cellar/openssl@1.1/1.1.1t: 8,101 files, 18.5MB
==> Installing redis
==> Pouring redis-7.0.11.big_sur.bottle.tar.gz
==> Caveats
To restart redis after an upgrade:
  brew services restart redis
Or, if you don't want/need a background service you can just run:
  /usr/local/opt/redis/bin/redis-server /usr/local/etc/redis.conf
==> Summary
?  /usr/local/Cellar/redis/7.0.11: 14 files, 2.6MB
==> Running `brew cleanup redis`...
Disable this behaviour by setting HOMEBREW_NO_INSTALL_CLEANUP.
Hide these hints with HOMEBREW_NO_ENV_HINTS (see `man brew`).
==> Caveats
==> redis
To restart redis after an upgrade:
  brew services restart redis
Or, if you don't want/need a background service you can just run:
  /usr/local/opt/redis/bin/redis-server /usr/local/etc/redis.conf
macbookpro@MacBookdeMacBook-Pro ~ %
3、 查看安装及配置文件位置
-
Homebrew安装的软件会默认在
/usr/local/Cellar/路径下 -
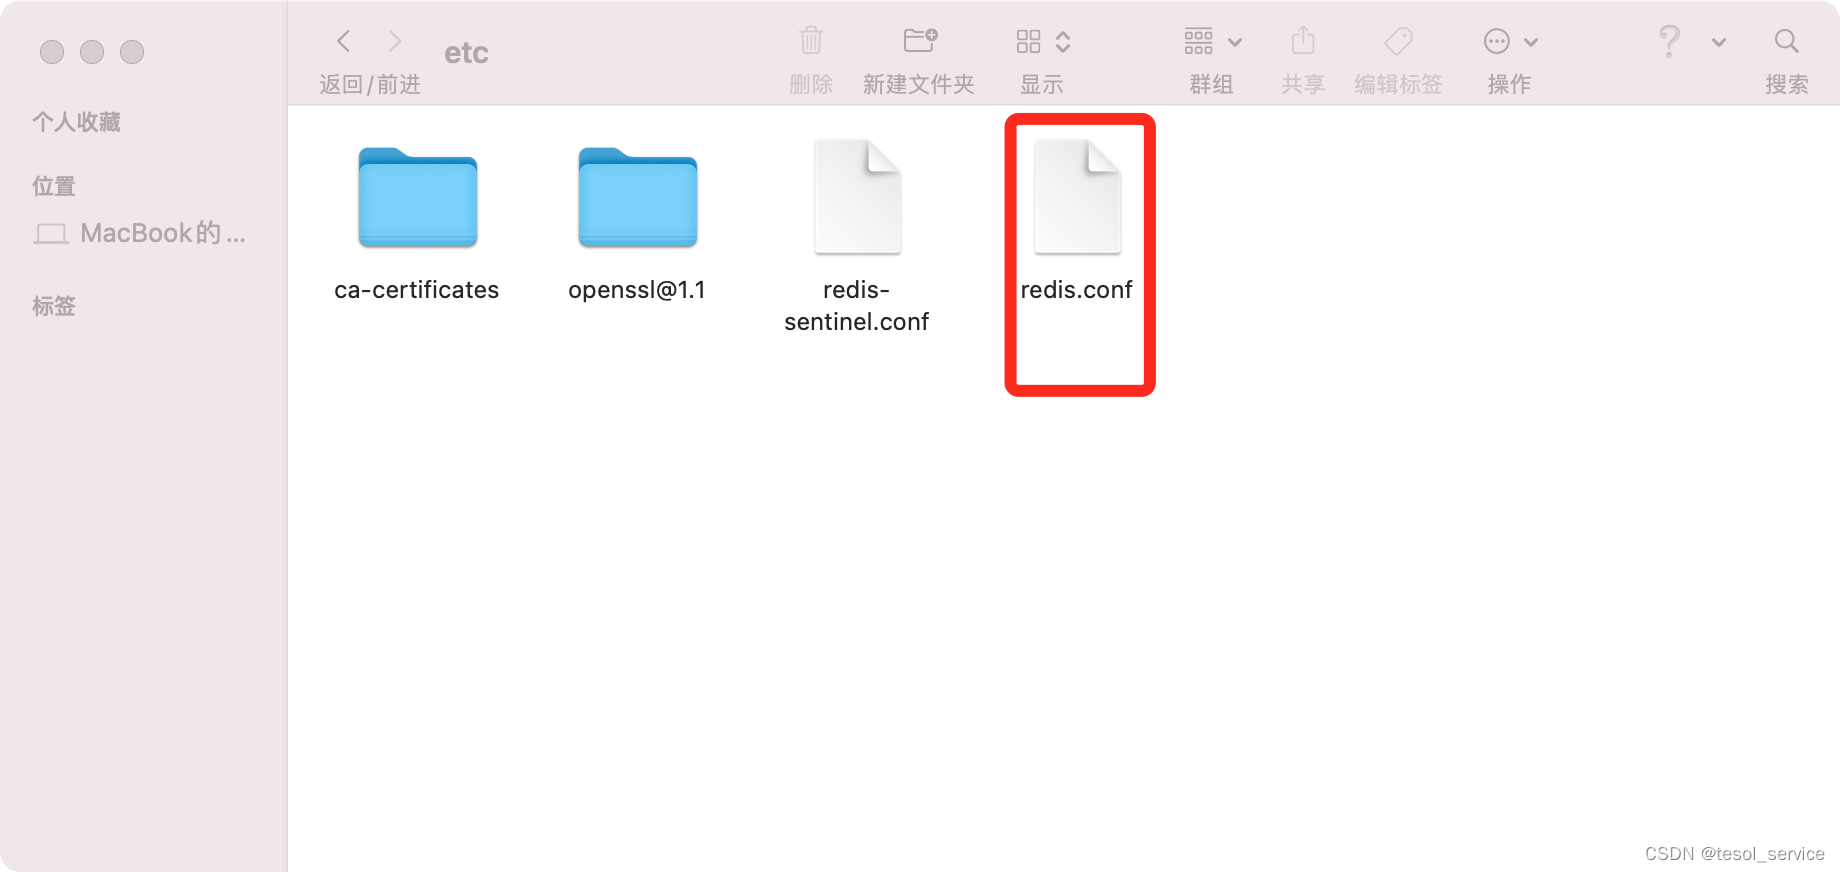
redis的配置文件
redis.conf存放在/usr/local/etc路径下
4.启动Redis命令:
//方式一:使用brew帮助我们启动软件
brew services start redis
//方式二
redis-server /usr/local/etc/redis.conf
//执行以下命令
redis-server
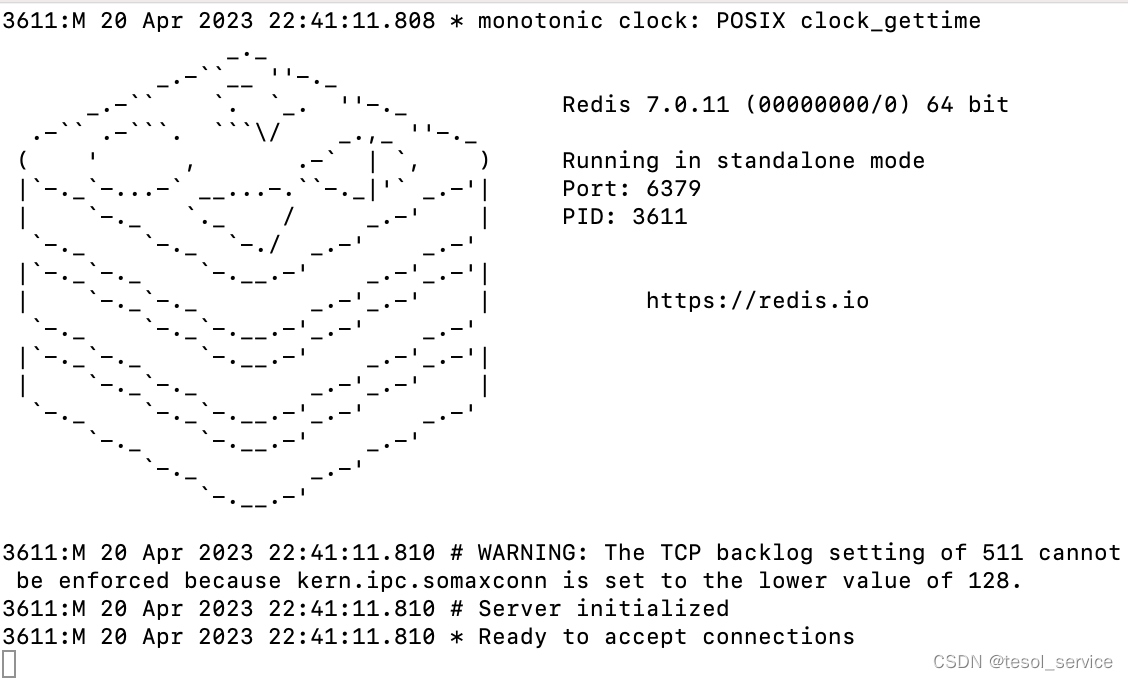
这里直接使用第二种启动方式,终端输入:redis-server /usr/local/etc/redis.conf
启动输出如下:

5、查看redis服务进程
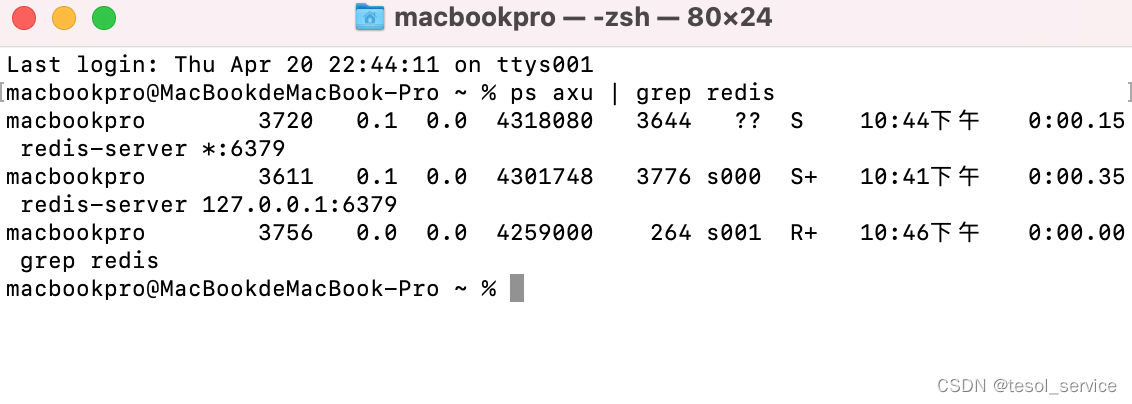
我们可以通过下面命令查看redis是否正在运行:
ps axu | grep redis重新打开一个终端,输入上面的命令,查看正在进行的Redis服务进程:

6、redis-cli连接redis服务
redis默认端口号6379,默认auth为空,输入以下命令即可连接:
redis-cli -h 127.0.0.1 -p 6379
7、启动 redis 客户端,打开终端并输入命令 redis-cli。该命令会连接本地的 redis 服务。
$redis-cli
redis 127.0.0.1:6379>
redis 127.0.0.1:6379> PING
PONG
在以上实例中我们连接到本地的 redis 服务并执行 PING 命令,该命令用于检测 redis 服务是否启动。
8、关闭redis服务
正确停止Redis的方式应该是向Redis发送SHUTDOWN命令
redis-cli shutdown强行终止redis
sudo pkill redis-server9、redis.conf 配置文件详解
回到Mac桌面顶部菜单栏 -> 前往 ->前往文件夹,然后在弹出框中输入路径:/usr/local/etc/redis.conf

由于文件过大,这里不在贴出打开后的内容(Mac自带的文本编辑器可以打开查看)redis默认是前台启动,如果我们想以守护进程的方式运行(后台运行),可以在redis.conf中将daemonize no,修改成yes即可。