【Unity2d】2DNavMesh自动寻路实现
在u3d中,系统自带了NavMesh组件,能够极其方便的实现自动寻路,新版的NavMesh并没有随着Unity的更新添加进引擎功能中,在2d项目中,我们想要实现NavMesh自动寻路还需要下载新的组件。这里提供网址:GitHub - h8man/NavMeshPlus: Unity NavMesh 2D Pathfinding
要在小伙伴们的项目中使用它:
1、将下载下来的压缩包(.zip)解压,将文件复制到Unity项目的 Asset 文件夹中。
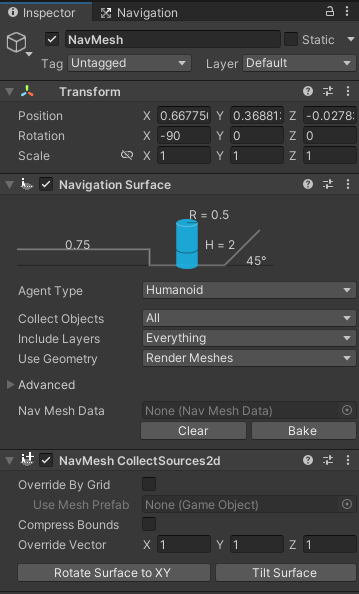
2、在场景根目录中创建空对象,命名为NavMesh。
3、将“Navigation Surface”组件添加到空对象,然后添加 NavMeshCollectSources2d 组件。
4、单击“Rotate Surface to XY”将表面旋转到 XY(使表面朝向标准 2D 相机 x:-90;y:0;z:0)
5、将“Navigation Modifier”组件添加到场景对象障碍物中,覆盖该区域。
6、在“Navigation Surface”中点击“Bake”。
以下是具体步骤:
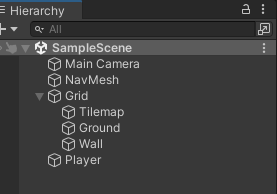
步骤 1,创建一个TileMap(GameObject -> 2D Object -> Tilemap),确保你的Tilemap在场景中覆盖了所有可行走的区域,添加地面、障碍物、墙体等等。

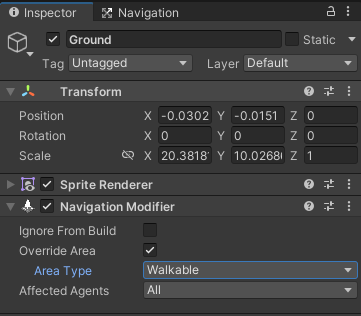
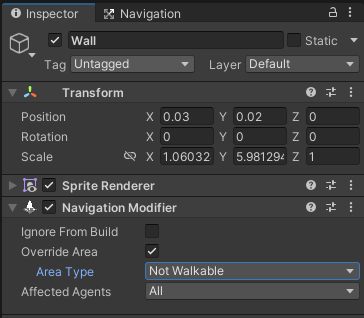
步骤 2,为地面添加“Navigation Modifier”组件,勾选Override Area,将Area Type属性设置为Walkable。同理,为障碍物或墙体添加“Navigation Modifier”组件,勾选Override Area,将Area Type属性设置为Not Walkable。


步骤 3,创建空对象,命名为NavMesh,将“Navigation Surface”组件添加到空对象,然后添加 NavMeshCollectSources2d 组件。单击“Rotate Surface to XY”将表面旋转到 XY(使表面朝向标准 2D 相机 x:-90;y:0;z:0),在“Navigation Surface”中点击“Bake”。

步骤 4,为角色添加“NavMeshAgent”组件,我在实现中遇到了一个问题,运行之后,Player对象消失了(非销毁),解决方案:继续为角色添加“Agent Override 2d”组件,问题解决了。下面我们添加一个脚本来验证自动寻路,代码如下:
using UnityEngine;
using UnityEngine.AI;

public class PlayerController : MonoBehaviour
{
    public Transform target;

    private NavMeshAgent _agent;

    private void Start()
    {
        _agent = GetComponent<NavMeshAgent>();
    }

    private void Update()
    {
        _agent.SetDestination(target.position);
    }
}
上述代码需要小伙伴们自己设置一个目标点,运行即可。
在实现过程中,小伙伴们可能会报一个错,“MissingComponentException: There is no 'MeshFilter' attached to the "Grid" game object, but a script is trying to access it.
You probably need to add a MeshFilter to the game object "Grid". Or your script needs to check if the component is attached before using it.”,解决方案:为Grid添加一个MeshFilter组件即可。